Friday, August 24, 2012 at 11:40 PM
Posted by Vivian in
Egg,
Japanese
It is not an exaggeration if I say that making this egg is akin to precision engineering. From getting it to the right consistency to removing the shell off without nicking it is no mean feat. Ensuring the yolk stays runny and not overly cooked but yet getting the white hard enough such that it doesn’t get mangled when de-shelling is an intricate balance.
I have been trying to prefect it but there are obviously still much room for improvement. If I do get it right, then I believe it is because of some divine intervention. Ploughed through quite a few sites to look for some tips and tricks. Unfortunately, I have not uncovered any magic. Everyone seems to be working with the same recipe. Am I missing something or most people just don’t bother whether the egg white stays whole? Perhaps it is high time for me to come to terms that “it is the inside that counts” and nothing else matters.
Luck was on my side last weekend with one particular egg out of the seven I made. It was decent looking enough for me to have it featured in the photo above. And so after more than 50 eggs and a good one and a half year of attempting to perfect my skills for this recipe, I am finally writing down what I think might work. Probably will still need a few attempts to convince myself that this is it!
Ingredients:
- 7 to 8 medium size eggs (cold and just out from the fridge!)
- 8 tablespoons of light soy sauce
- 6 tablespoons of water
- 6 tablespoons of Mirin
- 4 tablespoons of Sugar
- 2 tablespoons of dark soy sauce
Preparation:
- Bring to boil a pot of water enough to cover eggs.
- Reduce heat until the water is just bubbling.
- Lower eggs gently into water using the help of a ladle.
- Allow the eggs to boil for 9 minutes (most recipes call for 6 to 8 minutes but I find that even for 8 minutes the egg white is too soft to allow the shell to be easily removed).
- Remove eggs and immediately place them into an ice bath.
- Transfer the eggs in the ice bath to a fridge and let it sit for 3 to 4 hours.
- In the meantime, combine all remaining ingredients in a pot and bring to a simmer. Allow marinade to cool.
- Once the eggs are done with the "ice bath", make a small crack on one end of each egg and place the eggs back to the water for 1 to 2 minutes. I personally find that this allows the water to seep through between the shell and the egg, so that the shells remove much easier.
- Remove shells from egg.
- Marinate the eggs with the marinade overnight and turn the eggs at least once or twice during the process to ensure the eggs are evenly coated.
- Before serving, remove the eggs from the fridge and allow the eggs to warm up room temperature.
- Drain and halved the eggs.

Sunday, January 9, 2011 at 11:21 PM
Posted by Vivian in
Chicken,
Japanese,
Rice
For my life, I can't remember when was the last time I made Oyako Don. At one point I was whipping this so often that I could do it with my eyes close. Revisited what I posted 2 years ago to look up the recipe and realised that the photo was utterly crappy and I didn't revise the post to record the tweaks that I had made to the original recipe. Gosh!
So here it goes again....
Ingredients:
- 3/4 cup dashi
- 2 tablespoon sugar
- 4 tablespoon mirin
- 4 tablespoon light soy sauce
- 1 onion (sliced thinly)
- 4 chicken thigh (cut into bite size pieces)
- 4 eggs (break up yolks using chopsticks with a with zig-zag motion)
Preparation:
- Mix the dashi, sugar, mirin, and soy sauce. Divide into four portions.
- In a small frying pan, heat up one portion of the mixture together with the onion.
- Add chicken thigh in the pan as the sauce heats up.
- Cover the pan and let the chicken cook.
- Pour the eggs into the pan and let simmer until egg is 90% done.
- Slip the entire mixture from the pan onto a steaming bowl of rice.
- Top with seaweed or spring onion if desired.
Number of servings: 4
Thursday, December 31, 2009 at 10:36 PM
Posted by Vivian in
Japanese,
Potatoes,
Salad
Most people believe that what you bring over to the next year will continue to stay for the rest of the year. With barely 2 hours left to go before bidding goodbye to 2009, I am trying hard to complete as much as I possibly can just so that "procrastination" will not stick to me in 2010 too often and hopefully less leftover tasks to tackle. So here I am bashing away on my MacBook working hard to put up this post because the photo has been sitting in the compact flash card for way too long.
The last time I made this salad dish was... hmmmm... eons ago that I cannot remember when. This recipe originated from my mum-in-law and I believe a Japanese friend of hers gave it to her. It is a handy recipe to have - good for parties and special occassions, a definite crowd pleaser. It keeps well overnight and can therefore be prepared a day beforehand. We had a potluck party in the office recently and the first thing that came to mind was this salad. The whole pot was wiped clean before the lunch was over.
This is really simple to put together but in order to bring the best out of it a lot of patience is needed because the ingredients need to be diced finely (like all things Japanese, "delicate" is the operative word!). Somehow the taste is odd when the ingredients are chunky.
Ingredients:
- 6 medium-sized Russet potatoes
- 1 stick of carrot
- 5 eggs
- Mayonnaise (I use a mixed of Japanese Mayo and Kraft Mayo)
- 2 tablespoons of white vinegar
- 2 tablespoons of white sugar
Preparation:
- Bring a big pot of water to boil and place potatoes in. Allow potatoes to boil until soft.
- Place eggs in another pot and bring to boil. Allow eggs to cook for 10 minutes. Turn off heat and cover the pot. Let the eggs continue to sit in the hot water for another 10 minutes before removing the eggs from water. This is a way to prevent the greyish ring forming around the yolk.
- In the meantime, dice carrots finely. Cook in boiling water till soft and set aside.
- Once the eggs are done, remove shell. Halve the eggs and scoop out the egg yolk. Dice the egg white finely.
- Peel potatoes and dice finely.
- Using a big mixing bowl, mash and break up the egg yolks with a tablespoon. Add in vinegar and sugar. Mix well until a smooth paste is formed.
- Pour in egg white, carrots and potatoes.
- Top with Mayonnaise. A sinful amount is need to get it to the right consistency.
- Mix all ingredients together.
- More Mayonnaise to be added if required.
- Transfer to serving dish, cover and chill.
- Can be served with shrimps or Japanese cucumber on the side.
Number of Servings: 6 to 8
Celery can be added to this salad dish for added crunch. Just dice and boil. Mix in with all ingredients during preparation stage.
Monday, July 6, 2009 at 12:14 AM
Posted by Vivian in
Japanese,
Noodles,
Soup

I admit that before this, I had always thought that miso soup was simply miso paste mixed with boiling water. Good thing that I wasn't overly confident and checked the web for its recipe. Instead of water, it should be dashi plus miso paste.
I also found out the difference between red miso paste and yellow miso paste. The former contains more salt and is therefore more salty than the latter.
Ingredients:
- 200 gm udon
- 4 cups of dashi soup stock
- 1/3 cup of miso paste
Preparation:
- Bring dashi soup stock to boil.
- Using a small bowl, ladle some dashi over miso and mix to get a smooth paste. This is to prevent lumpy miso floating in the soup later.
- Turn down heat and add in miso.
- Allow the soup to simmer. Do not let the soup boil as the miso taste will dissipate.
- Serve miso soup over pre-cooked udon.
Sunday, July 5, 2009 at 11:54 PM
Posted by Vivian in
Chicken,
Japanese

The title of this week's post should really be "Chicken Porridge" because that was what I had initially planned to make. Both Matty and Elaina came down with stomach flu on Thursday, just one day after Matty's birthday. In a way I had to count ourselves lucky that it didn't happen on Matty's birthday, otherwise he will be very disappointed for not being able to celebrate his birthday.
Decided that I should change the menu because the kids went back to their normal diet by Friday dinner and were doing fine by then. If I were to cook the boy porridge on Saturday, be sure that there will be some unhappiness in the family.
And I really need to start picking up some tips on pan-frying. Tried doing it with fish and it turned out to be a disaster. Even with chicken thigh, I only managed to get 2 out of 6 nicely done. The other 4 didn't turn out too well.
Ingredients:
- 6 chicken thigh (de-boned)
- 6 tablespoons of teriyaki sauce
- 3 tablespoons of honey
Preparation:
- Marinade chicken with 3 tablespoons of teriyaki sauce and leave in fridge overnight.
- Mix together 3 tablespoons of teriyaki sauce and 3 tablespoons of honey.
- Using a non-stick pan, pan-fry chicken thigh skin side down until it has browned evenly.
- Turn chicken over to the other side and do likewise.
- Cook chicken thoroughly and drizzle teriyaki-honey mixture over chicken.
Number of Servings: 6
Monday, May 4, 2009 at 12:04 AM
Posted by Vivian in
Japanese,
Noodles
I wish I had chosen to make this noodle dish with udon instead of soba. Somehow the buckwheat taste doesn't go well with miso. I should have guessed as much because I don't recall ever seeing soba noodles served in miso soup. Anyway I am putting this down for records so that I will remember to try it again with udon that is!
To round off the meal, I made yakitori to go with the noodles. Yakitori is a once in a while treat for the family because I find it quite time-consuming having to skew the chicken one piece at a time... and it didn't help that Elaina was in a cranky mood today.
Ingredients:
- 7 ounces dried udon or soba (cooked according to instructions)
- 2 garlic cloves (minced)
- 6 ounces shimeji mushrooms
- 2 tablespoons light soy sauce
- 2 teaspoons miso paste
- 2 tablespoons finely minced parsley
Preparation:
- Heat oil in a skillet over a low heat and add the garlic cloves. Saute until fragrant.
- Turn up the heat and add the shimeji mushrooms and saute until the mushrooms are soft.
- Lower the heat and add a ladleful of water, soy sauce and the miso paste. Stir until the miso is dissolved well.
- Adjust seasoning with salt and pepper and leave the sauce to simmer.
- Add noodles to the sauce. Stir well to coat every noodle
- Serve with chopped parsley.
Number of Servings: 2

Monday, April 13, 2009 at 11:06 PM
Posted by Vivian in
Japanese,
Rice
I had this recipe sitting in my "list of dishes to try" for a while and almost forgot about it. Maki of Just Hungry wrote an interesting article on Omu Rice and in her words "Omu rice, or rice omelette, is an example of yohshoku, Japanese food that originated in the west but was changed around to suit the Japanese palette".
I recall that the first and last time I had Omu Rice was a long long time ago at this Japanese restaurant located in Raffles City, which had closed down few years back. Haven't seen this appearing in the menu of other Japanese restaurant. I wonder why.
The most tedious part of making this dish is the need to make omelette after omelette just to meet the required quantity in order to feed the whole family. Practice does make perfect though. By the time I got to the 5th omelette, I was able to get it at the right consistency and in a bright yellow without a hint of browning.
Ingredients:
- 2 cups of cooked white rice
- 1 onion (finely chopped)
- 2 large cloves of garlic (finely chopped)
- 3 chicken thigh (de-boned and cut into small pieces)
- 1 can of button mushroom (sliced)
- 4 tablespoons of tomato ketchup
- 8 eggs (beaten and seasoned with salt)
- 100 ml of cooking wine
- Salt and pepper
Preparation:
- Season chicken with some salt (or light soy sauce) and pepper.
- Heat butter or cooking oil in frying pan.
- Saute garlic until fragrant. Add in onion and fry until translucent.
- Add in chicken and stir-fry until almost done.
- Add button mushroom to pan and continue to allow the chicken and mushroom to thoroughly cook.
- Pour wine into mixture and let the alcohol completely evaporate.
- Add in tomato ketchup and rice, and stir to mix well.
- Remove from heat and divide rice mixture into 4 portions.
- Coat skillet with oil.
- Make an omelette with 2 beaten eggs over medium to low heat. The omelette is only cooked on the underside, and the top should be slightly runny in the middle.
- Once done, turn off the heat and top 1 portion of the rice mixture on one side of the omelette.
- Using the help of a frying slice, fold the longer side over the rice.
- Lift and tilt the skillet and carefully roll the Omu Rice onto serving plate.
- Top with some ketchup and serve with vegetables on the side.
- Repeat the steps for omelette 3 times.
Number of Servings: 4
Sunday, February 1, 2009 at 10:50 PM
Posted by Vivian in
Japanese,
Mushroom,
Rice
I was very excited when I first chanced upon www.justhungry.com. It was the answer to my thirst for Japanese recipes. The author of the site is a Japanese and I believe that the recipes are very authentic.
Here's a recipe picked up from justhungry.com. I had reduced the proportion of dashi to rice, as opposed to what was stated in the original recipe because the rice was way too mushy.
Ingredients:
- 320ml of Japanese rice
- 200ml dashi stock
- 300gm of mixed mushrooms (shiitake, oyster mushroom or Shimeji)
- 2 tablespoon of mirin
- 2 tablespoon of light soya sauce
- 1 fried bean curd (aburaage) (optional)
Preparation:
- Wash the rice until water runs clear and drain
- Slice the mushrooms or shred with hands
- Cut aburaage into small pieces
- Marinate mushrooms and aburaage with light soya sauce and mirin for at least an hour
- Put rice in a rice cooker, add dashi and mushroom mixture
- Cook the rice as per normal
Number of Servings: 4
Chicken can be added as a variation to this recipe
at 3:42 PM
Posted by Vivian in
Chicken,
Japanese,
Noodles

A recipe that was spun-off from the beef version...
Ingredients:
- 300 gm soba (pre-cooked)
- 4 chicken thigh (sliced)
- 100 gm beansprout (tail and head removed)
- Teriyaki sauce
- 2 cloves of garlic (diced)
- 2 tablespoon of corn flour
Preparation:
- Marinate the chicken with 2 tablespoon of teriyaki sauce and corn flour for at least 1 hour
- Heat oil in wok and add in garlic
- Stir-fry the chicken until cooked with juices running out
- Add in the soba and 1/2 cup of teriyaki sauce and mix evenly
- Stir in the beansprout
- Top with some Japanese seaweed before serving (optional)
Number of Servings: 4
at 3:14 PM
Posted by Vivian in
Beef,
Japanese,
Noodles

This noodle dish originated from a famous Australia food magazine - Superfood Ideas, but this recipe is somewhat far from the original. I made a few tweaks to the recipe because I find the original a little too dry to my liking.
The most challenging part is to get the beef cooked to the right texture and it took me a few attempts before I got it right.
Ingredients:
- 300 gm soba (pre-cooked)
- 300 to 400 gm lean beef (sliced)
- 100 gm beansprout (tail and head removed)
- Teriyaki sauce
- 2 cloves of garlic (diced)
- Freshly ground black pepper
Preparation:
- Marinate the beef with 3 tablespoon of teriyaki sauce for at least 1 hour
- Heat oil in wok and add in garlic
- Using high heat, quickly stir-fry beef until 80% done and set aside
- Add 1/2 cup of teriyaki sauce to the same wok and bring it to boil
- Add soba to the boiling teriyaki sauce and mix evenly
- Stir in the beansprout and let it cook
- Put the beef back into the wok and stir-fry a little ensuring that it doesn't overcook
- Quickly grind some black pepper over the noodles and mix evenly
- Top with some Japanese seaweed before serving (optional)
Number of Servings: 4
Monday, January 19, 2009 at 2:38 PM
Posted by Vivian in
Japanese,
Pork
 Ingredients:
- 6 pork fillet or pork loin
- A dash of salt or light soya sauce
- Pepper to taste
- Plain flour
- 1 egg
- Panko
Preparation:
- Pat-dry the meat and pound the meat with the back of the knife.
- Marinate the meat with some pepper and salt (or light soya sauce).
- Crack and beat the egg, and mix in about 2 to 3 teaspoon of water to thin the consistency
- First, coat the fillets with plain flour.
- Secondly, coat it with egg mixture.
- Lastly, coat with panko - using fingers to apply a bit more pressure to ensure that the whole fillet is coated with panko.
- Deep-fry the fillets until golden brown.
- Top with tonkatsu sauce.
Number of Servings: 2 to 3
at 12:21 AM
Posted by Vivian in
Japanese,
Noodles
 Ingredients:
- 4 packs of udon noodles
- 6 cups of dashi
- 1 teaspoon sugar
- 1 tablespoon mirin
- 1/2 cup soy sauce
Preparation:
- Heat up dashi.
- Add sugar, mirin, soysauce.
- Turn off gas before it comes to a boil.
- Boil udon and drain.
- Put noodles in empty warmed bowls and add in soup
Number of Servings: 4
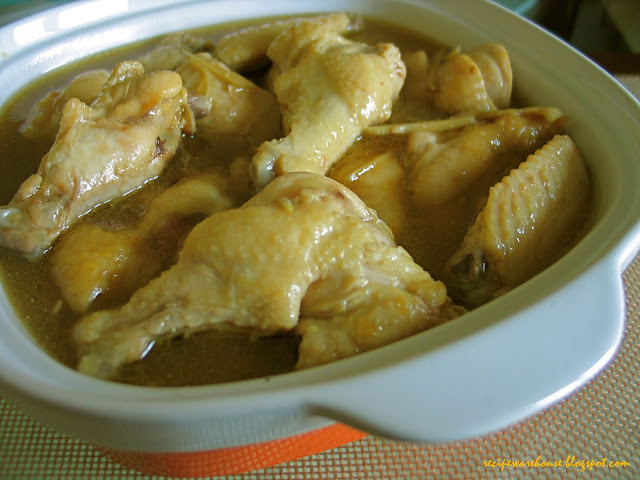
Sunday, January 18, 2009 at 11:44 PM
Posted by Vivian in
Chicken,
Japanese,
Rice

Can't quite recall where exactly this recipe was picked up from... but this is a definte gem. Quick, easy and an almost-no-mess recipe.
The difficult part is getting the egg right. It was after a few rounds of trial and error before I worked out the magic. Never beat or whisk the egg because by doing so air will be incoprated into the egg and the end result is a pot of "stewed scrambled egg". Instead use the chopsticks to do a couple of zig-zag actions to break the yolk. Another important tip is to turn down the fire to low and let the egg simmer.
Ingredients:
- 1 cup dashi
- 2 tablespoon sugar
- 4 tablespoon mirin
- 6 tablespoon light soy sauce
- 1/2 onion (sliced thinly)
- Chicken thigh (cut into bite size pieces)
- 2 eggs
Preparation:
- Mix the dashi, sugar, mirin, and soy sauce. Divide into four portions.
- In a small frying pan, heat up one portion of the mixture.
- Arrange the onion slices and chicken thigh in the pan as the sauce heats up.
- Cover the pan and let the chicken cook.
- Pour the eggs into the pan and cook until 90% done.
- Slip the entire mixture from the pan onto a steaming bowl of rice.
- Top with seaweed (optional)
Number of servings: 4


.JPG)


.JPG)


