Braised Ee Fu Noodles with Conpoy (瑤柱干烧伊府面)

0 comments

Finally after so long, I get to put on a new posting. I seemed to be running out of luck with my photos lately and often ended up chucking the whole lot. It was either due to the lack of natural lighting or the entire composition just doesn’t look right and the photos turned out to be in a total mess. Plus, I haven’t sighted any new recipes recently to get me excited and had been working perfectly fine just recycling what I had collected in the past.

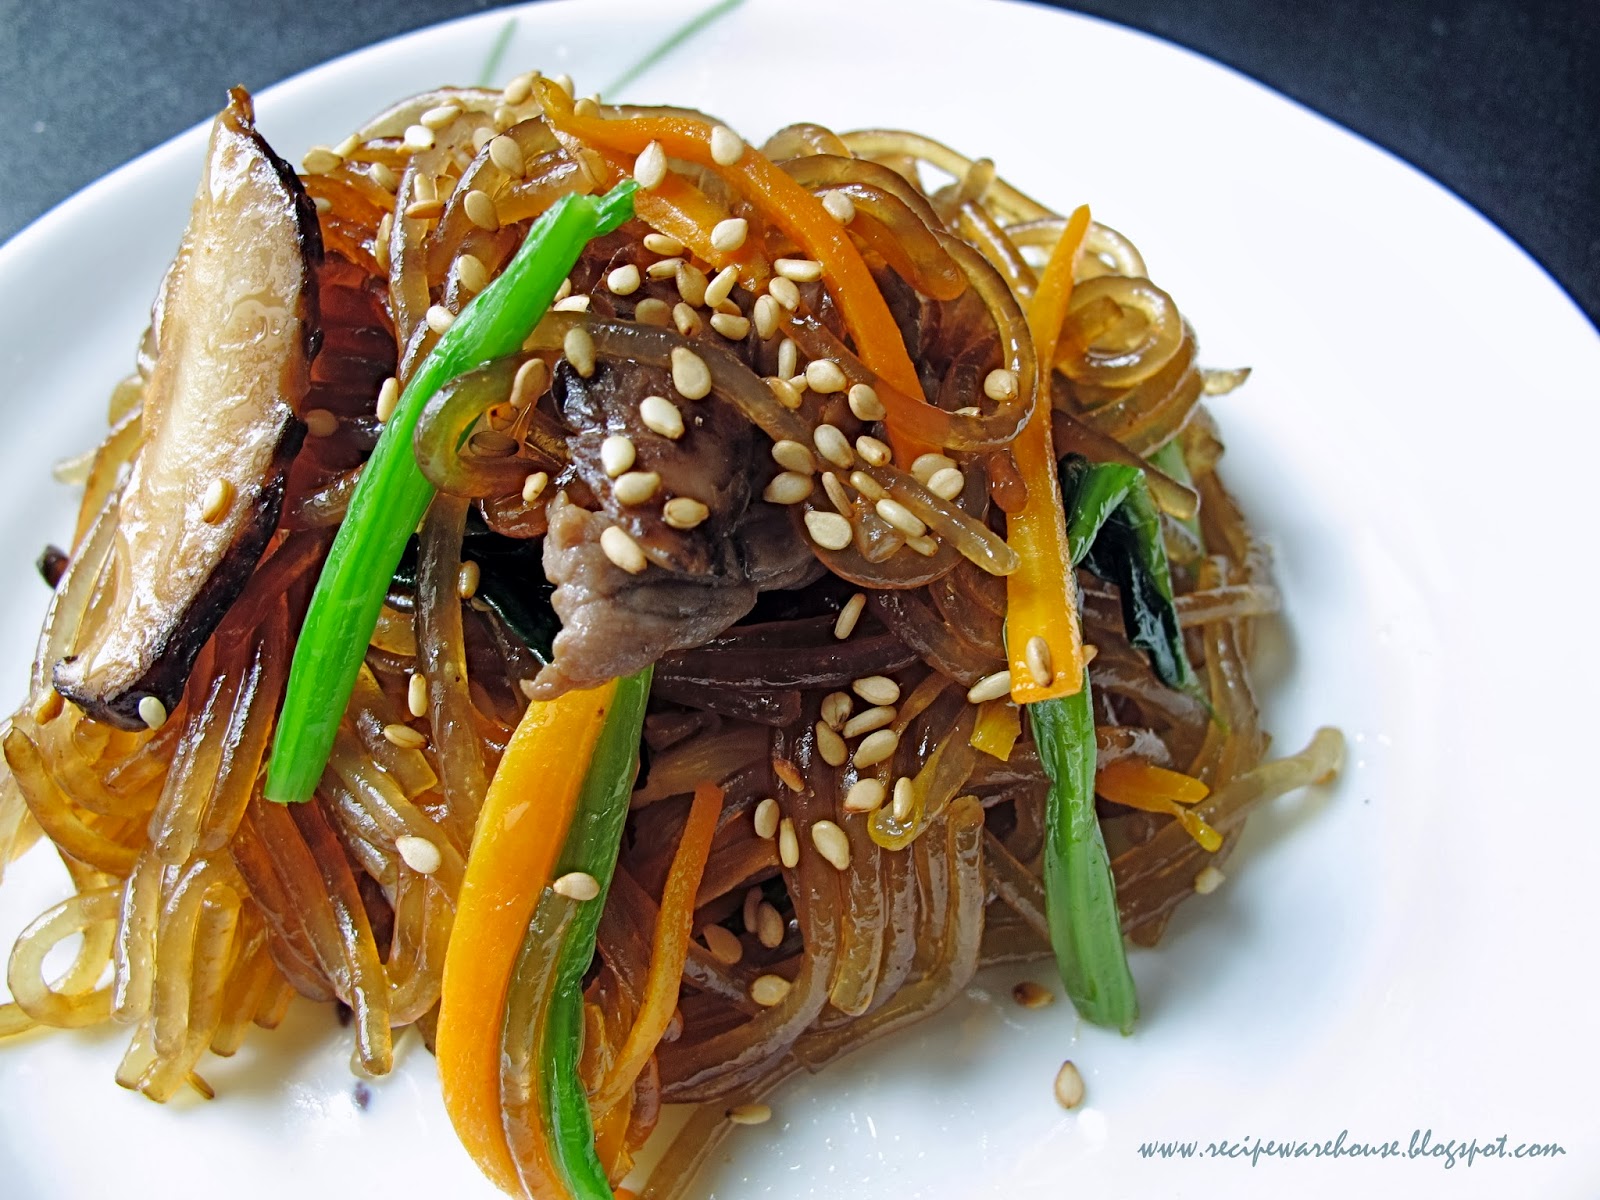
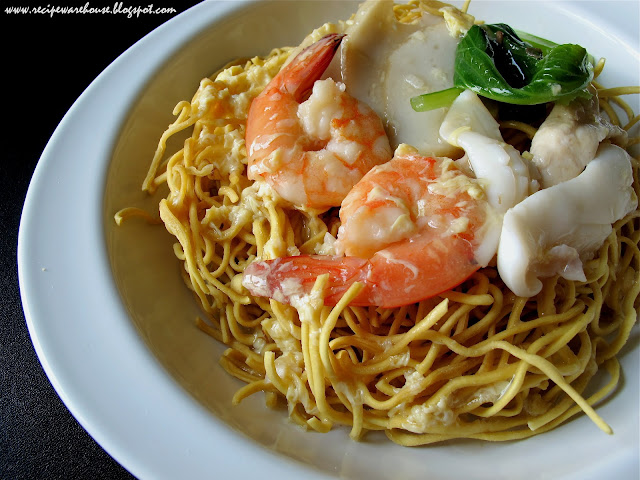
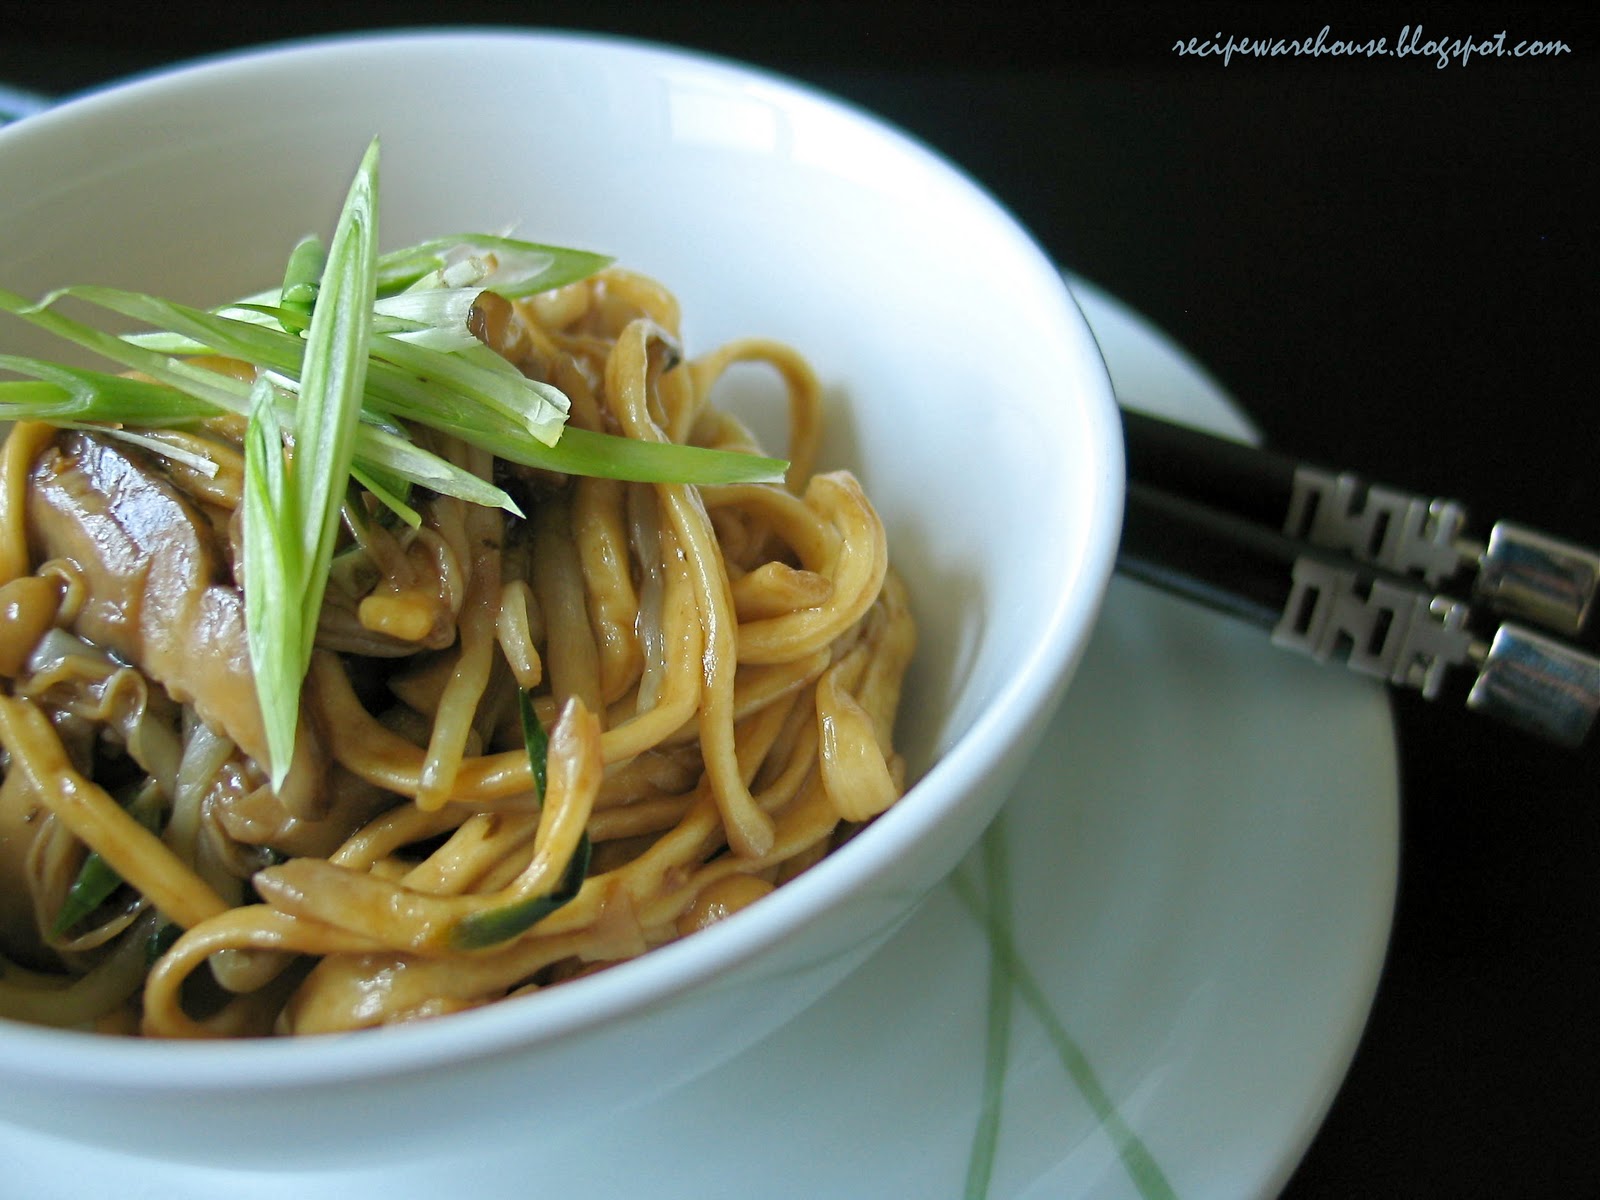
Actually this recipe is just a variation to the Ee Fu Noodles I posted on months back. Some time ago, I bought a packet of Ee Fu Noodles with conpoy that cost me $30 and could barely feed two. I was really expecting something double that size If not for the free cash voucher I bought it with, I would have let out a big and long ouch. What’s more, there were only 2 miserable dried scallops in that box of noodles. I know dried scallops are expensive but still I felt cheated.

I decided that I was too cheapstake to pay $30 bucks for something that would only cost me half the price for double that portion if I whip it up in my own kitchen. And what’s more, a recipe that is almost idiot-proof.

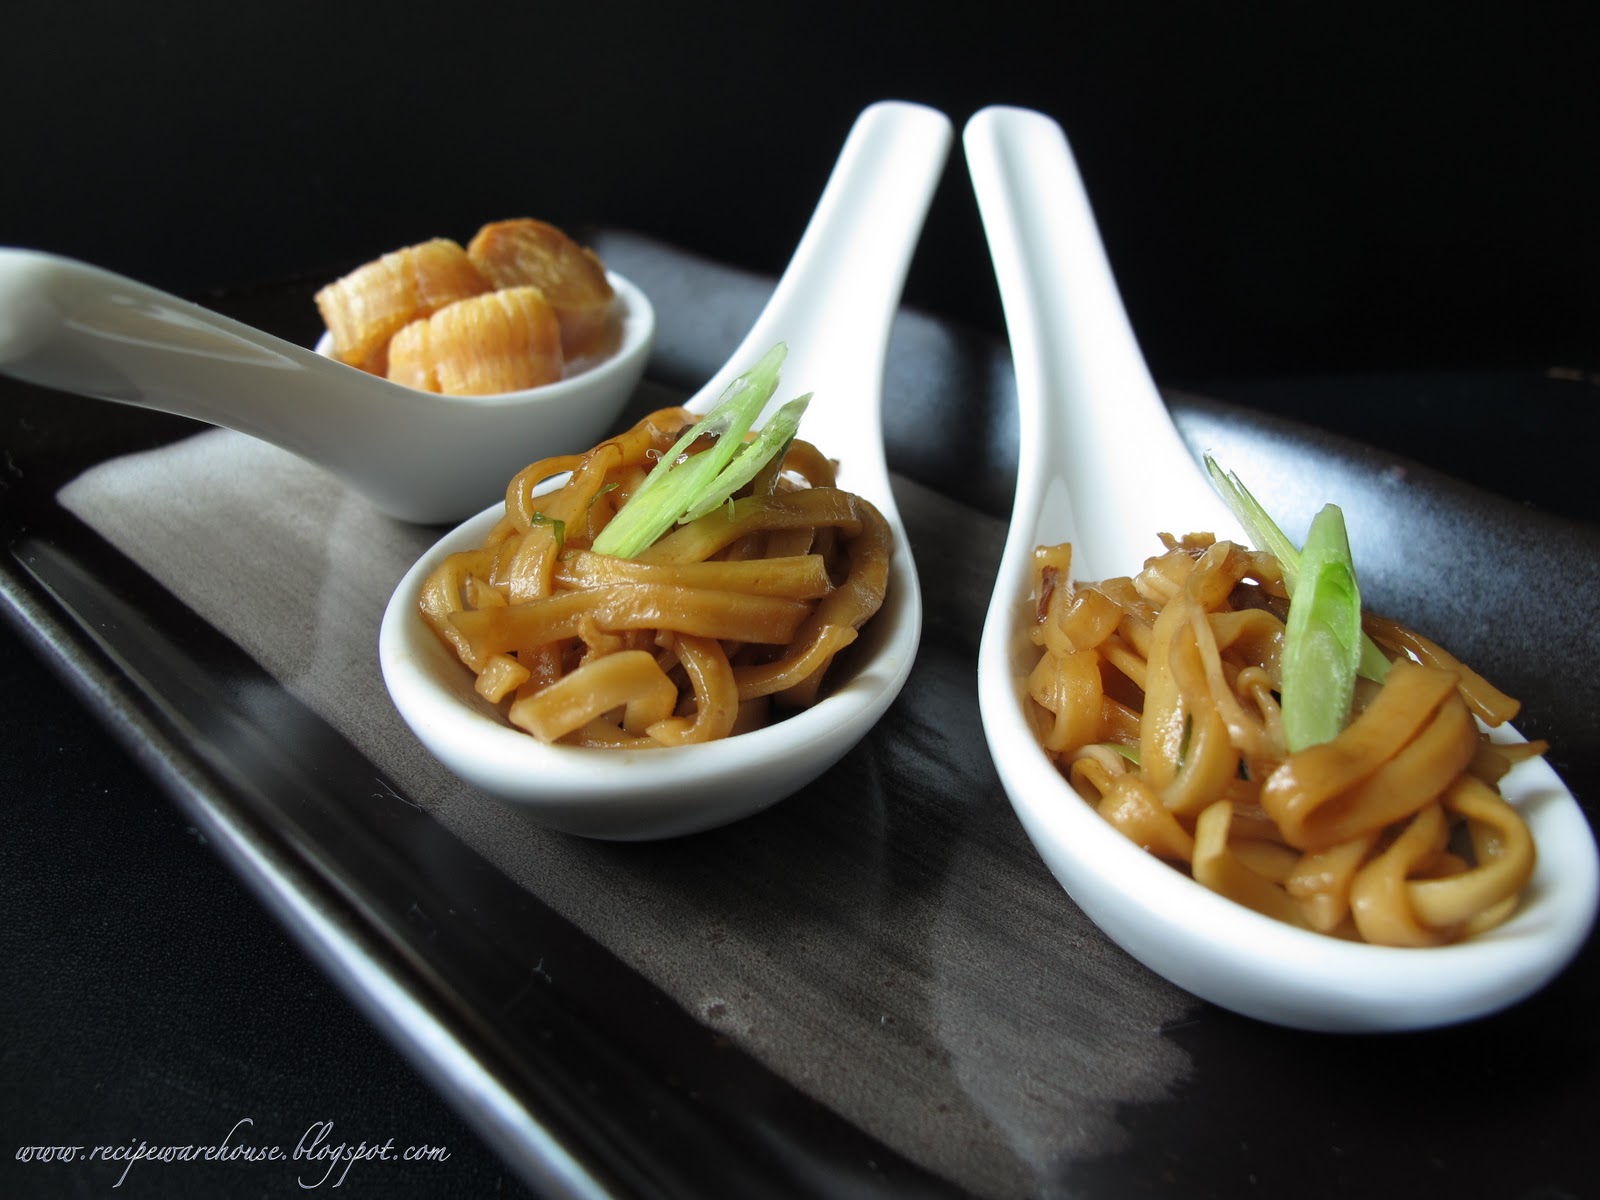
The only additional step to the original recipe is to add in the shredded dried scallops with the other ingredients during the frying process. Simple as that.

6 to 7 mid-sized dried scallops were soaked overnight, and shredded using finger tips just before cooking.

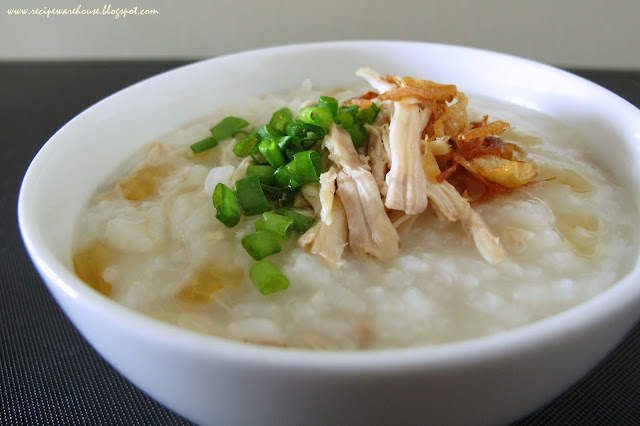
Dried scallop also known as conpoy is viewed as a delicacy in Chinese cuisine.
Often added to congee and soup for added flavor

Cantonese Style Soy Sauce Chicken (酱油鸡)

1 comments

Sometime back I attempted this same dish (the recipe came from some source that I cannot recall by now) which turned out to be an utter failure and got tossed out of the window... I mean the recipe not the chicken!

I guess that I wasn't passionate enough and didn't continue in my pursuit for the right recipe until recently when I got lucky and managed to find the one without much fuss.

To round up the meal, I paired the chicken off with Hong Kong style egg noodles and Choy Sum, drizzled with the sauce leftover from stewing the chicken and made it "See Yao Gai Min" (酱油鸡面)

The following recipe is adapted from Rasa Malaysia.


Ingredients:
  • 10 chicken drumsticks
  • 2-inch ginger (skin peeled and lightly pounded)
  • 4 cloves garlic (lightly pounded)
  • 2 stalks scallions (cut into 2-inch lengths)
  • 2 star anise
  • 1 cinnamon stick (about 2-inch length)
  • 200 ml of light soy sauce
  • 150 ml of dark soy sauce
  • 1 tablespoon Shaoxing wine
  • 3 dashes white pepper powder
  • 4 tablespoons of white sugar
  • 4 cups water

Preparation:
  • Add all ingredients (except the chicken) into pot and bring to boil over high heat for 15 minutes. 
  • Add the chicken into the pot and boil over high heat for another 10 minutes. 
  • Lower the heat and allow to simmer for about 30 minutes.
  • If possible, leave chicken in the soy sauce mixture for at least an hour to soak in the flavor.

Wantons - the improved version (云吞)

0 comments


Since the last post on wantons, I have gone on to make this repeatedly and experimented with different tweaks by adding different ingredients or condiments.  By far this are the best tweaks combined to deliver the best result:

Tweak #1 - Instead of cooking the wantons in a big pot of soup, use chicken broth.  The wanton skin takes on a different flavour.

Tweak #2 - Add minced shrimp to the minced pork for a better bite.  Mix well and preferably with (clean) hands in a kneading motion.

Tweak #3 - Replace ginger water with concentrated chicken stock.

Stir-Fried Scallops and Pacific Clams with Broccoli (花开富贵)

0 comments


I have been doing some "sitting on my butt" for way too long. This was supposed to have made its way here before Lunar New Year was over, obviously it didn't quite happen.  Days, turned into weeks and weeks into a month.  My mind has been preoccupied lately with battling stuff and unfortunately people, and it leaves me completely drained.  Plus the house is falling apart with things turning wonky all at the same time.  Well... at least the Daikin folks are taking much longer to fix the air conditioner than me getting this entry up.

Anyways, back to this dish with a auspicious-sounding name that describes nothing but spring (which by the way I also found out that there are many other dishes out there with the same Chinese name but boy do they all look different!).  Obviously, this was deliberately dished out with Chinese New Year in mind and also because I bought a can of pacific clams and wanted to make something different other than pouring the whole can into a big pot of soup.  So I bought a bag of scallops to go with the pacific clams... think buying a dress to pair up with the shoes.

If you ask me, the taste didn't quite wow me.  It tasted almost like this shrimp and broccoli dish.  Probably because I was hoping for something very different.  Almost like a mismatch of expectation and reality.


Ingredients:

  • 1 can of pacific clams
  • 15 pieces of fresh scallops
  • 1/3 stick of carrot (thinly sliced or cut into flower shape)
  • 1 bunch of broccoli (stem removed and cut)
  • 5 cloves of garlic (minced)
  • 3 slices of ginger
  • 2 stalks of spring onion (ends only)
  • 1 teaspoon of Shaoxing wine
  • 1 cup of chicken broth
  • 1 tablespoon of oyster sauce
  • 1 tablespoon of light soy sauce
  • 1 teaspoon of sesame oil
  • Corn starch (100ml of water mixed with 1 level tablespoon of cornflour)


Preparation:

  • Blanch broccoli and set aside.
  • Saute garlic (half of above indicated quantity), ginger and spring onion with a little bit of oil until fragrant
  • Sprinkle with Shaoxing wine and add in chicken broth.
  • Once the mixture starts to boil, add in scallops and allow to cook for about 2 minutes.
  • Drain and remove scallops,  Set aside for later use.
  • Using a clean pan, stir-fry the remaining minced garlic.
  • Add carrot to the pan and when it is half done, add in pacific clams.
  • Stir-fry mixture until thoroughly cooked.
  • Mix in oyster sauce, light soy sauce and sesame oil.
  • Return into the pan.
  • Turn the heat down and add in cornstarch. 
  • Let simmer until the sauce thickens.
  • Transfer to serving plate and garnish with broccoli.


Number of servings: 4 to 5

Steamed Tofu with Minced Meat

0 comments


I personally find that the hardest dishes to get to perfection are usually the simple fanfare.  Take for instance, frying an omelette to the perfect hue and flipping it over without breaking the egg apart, or making an onsen tamago with the right consistency - runny yolk with harden egg white, and peeling the shell off without  nicking the egg (a separate post will be dedicated to my onsen tamago soon).

Egg aside, my main lead for this post is just as bad.  Getting the tofu out of its packaging in one whole piece without breaking a corner off is harder than stir-frying sliced beef to the right doneness!  Unfortunately, the tofu didn't turn out to be as presentable as I had pictured as a result, but at least I wasn't disappointed with the taste. 

This recipe was inspired by my mum.  It was one of those quick-fix dish that she fed me and my siblings with when we were little.  No fuss, low budget but full of proteins.  I tweaked it a little by making a base sauce to go along with the tofu, but otherwise it is still fine on its own.


Ingredients:
  • 1 box of tofu (either sliced into 8 pieces or used as it is)
  • 100 gm of minced meat (pork of chicken works fine)
  • 1/2 tablespoon of light soy sauce
  • 1 teaspoon of cornflour
  • 1 teaspoon of sesame oil
  • 2 cloves of garlic (minced)
  • 1 packet of Shimeji mushroom (roots removed and separated)
  • 150 ml of chicken broth or water
  • 1 tablespoon of oyster sauce
  • 100 ml of cornstarch (100 ml of water with 1 tablespoon of cornflour)

Preparation:
  • Marinate minced meat with light soy sauce, sesame oil and cornflour for at least 30 minutes.
  • Spread the minced meat evenly on top of tofu.
  • Steam tofu for 10 minutes or until the minced meat is thoroughly cooked.
  • In the meantime, heat 1 tablespoon of oil in frying pan and add in garlic.
  • Add mushroom to pan and stir fry until well-cooked.
  • Pour in oyster sauce and chicken broth and mix well. 
  • Lower the heat and drizzle in cornstarch.  Let simmer until the sauce thickens.
  • Once the tofu is done, remove from steamer and transfer to serving plate.
  • Ladle sauce over tofu and serve.

Steamed Minced Meat on the spoon for someone who thinks that he will get poisoned for eating tofu!


And the kids asking that I take a photo of them with the minced meat.....


(The Remake of) Oyako Don (親子丼)

0 comments

For my life, I can't remember when was the last time I made Oyako Don.  At one point I was whipping this  so often that I could do it with my eyes close.  Revisited what I posted 2 years ago to look up the recipe and realised that the photo was utterly crappy and I didn't revise the post to record the tweaks that I had made to the original recipe.  Gosh!

So here it goes again....


Ingredients: 
  • 3/4 cup dashi 
  • 2 tablespoon sugar 
  • 4 tablespoon mirin 
  • 4 tablespoon light soy sauce 
  • 1 onion (sliced thinly) 
  • 4 chicken thigh (cut into bite size pieces) 
  • 4 eggs (break up yolks using chopsticks with a with zig-zag motion)

Preparation:
  • Mix the dashi, sugar, mirin, and soy sauce. Divide into four portions. 
  • In a small frying pan, heat up one portion of the mixture together with the onion. 
  • Add chicken thigh in the pan as the sauce heats up. 
  • Cover the pan and let the chicken cook. 
  • Pour the eggs into the pan and let simmer until egg is 90% done. 
  • Slip the entire mixture from the pan onto a steaming bowl of rice. 
  • Top with seaweed or spring onion if desired.

Number of servings: 4

Flaky Pizza... a pizza with puff pastry crust

0 comments

About 2 over months ago, we brought the kids out for dinner at Bakerzin because Matty was hammering for pizza and Elaina just wanted mushroom pasta.  We managed to convince Matty that the pizza at Bakerzin is rather different from the usual ones and that he will not regret giving it a try.  Sure enough, he chomped up the entire plate of pizzas but unexpectedly, he asked if I could make the same at home.

I took on the challenge and decided to give it a go with my trusted frozen prata dough (my preferred option over puff pastry dough just only because I don't need to roll it and it is in the right shape!). That following weekend, my cover version of Bakerzin flaky pizza was born.  Didn't blog about it or took any photos back then because I was still in my "no-mood-for-anything-and-feeling-frustrated-from-my-lack-of-voice-quality-after-thyroid-surgery" mode.

So 2 months later, I am glad that I made this again today.  Initially I was disappointed that the supermarket had ran out of my favourite plain frozen prata and had to settle for the onion flavoured prata dough of the same brand, but it turned out to be a pleasant surprise because the crust had a very nice flavour to it in the end.

Now I am contemplating of using a proper puff pastry dough next time just to see the difference... but that will be a while more since I have been feeling very sick from eating all the rich food this holiday season.


Ingredients:

  • 1 frozen prata dough
  • Toppings for pizza as desired (mushroom, ham, parsley and shredded mozzarella cheese was what I used today)


Preparation:


  • Preheat oven to 180 degree Celsius, fan forced (somehow it puffs the dough better in my opinion)
  • Lay prata dough on a cookie pan or pizza pan, dusted with some flour.  I usually lined it with a piece of foil and it works perfectly well.
  • Place prata dough in oven.
  • 5 mins later, the dough will start to balloon.  Use a fork to make a small tear on the top to let the air escape.  The dough will gradually deflate.
  • Let dough bake for another 10 minutes.
  • Remove crust from oven.  Keeping the crust on the same pan and top with desired toppings.
  • Return pizza back into the oven.
  • Bake for another 15 minutes or until cheese turns golden brown (if cheese added as toppings).


Number of Servings:
1