Thursday, December 31, 2009 at 10:36 PM
Posted by Vivian in
Japanese,
Potatoes,
Salad
Most people believe that what you bring over to the next year will continue to stay for the rest of the year. With barely 2 hours left to go before bidding goodbye to 2009, I am trying hard to complete as much as I possibly can just so that "procrastination" will not stick to me in 2010 too often and hopefully less leftover tasks to tackle. So here I am bashing away on my MacBook working hard to put up this post because the photo has been sitting in the compact flash card for way too long.
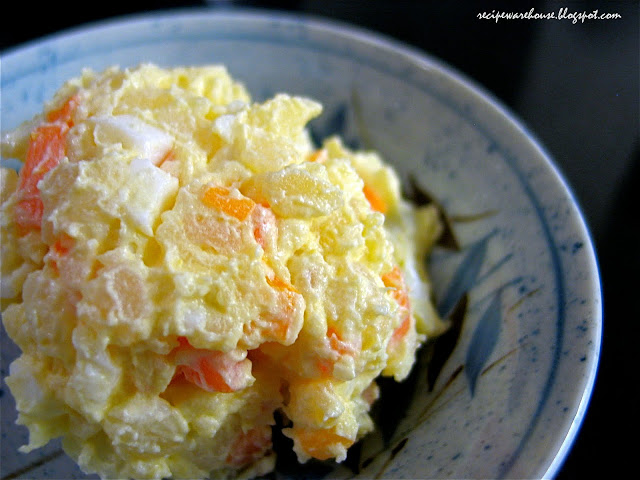
The last time I made this salad dish was... hmmmm... eons ago that I cannot remember when. This recipe originated from my mum-in-law and I believe a Japanese friend of hers gave it to her. It is a handy recipe to have - good for parties and special occassions, a definite crowd pleaser. It keeps well overnight and can therefore be prepared a day beforehand. We had a potluck party in the office recently and the first thing that came to mind was this salad. The whole pot was wiped clean before the lunch was over.
This is really simple to put together but in order to bring the best out of it a lot of patience is needed because the ingredients need to be diced finely (like all things Japanese, "delicate" is the operative word!). Somehow the taste is odd when the ingredients are chunky.
Ingredients:
- 6 medium-sized Russet potatoes
- 1 stick of carrot
- 5 eggs
- Mayonnaise (I use a mixed of Japanese Mayo and Kraft Mayo)
- 2 tablespoons of white vinegar
- 2 tablespoons of white sugar
Preparation:
- Bring a big pot of water to boil and place potatoes in. Allow potatoes to boil until soft.
- Place eggs in another pot and bring to boil. Allow eggs to cook for 10 minutes. Turn off heat and cover the pot. Let the eggs continue to sit in the hot water for another 10 minutes before removing the eggs from water. This is a way to prevent the greyish ring forming around the yolk.
- In the meantime, dice carrots finely. Cook in boiling water till soft and set aside.
- Once the eggs are done, remove shell. Halve the eggs and scoop out the egg yolk. Dice the egg white finely.
- Peel potatoes and dice finely.
- Using a big mixing bowl, mash and break up the egg yolks with a tablespoon. Add in vinegar and sugar. Mix well until a smooth paste is formed.
- Pour in egg white, carrots and potatoes.
- Top with Mayonnaise. A sinful amount is need to get it to the right consistency.
- Mix all ingredients together.
- More Mayonnaise to be added if required.
- Transfer to serving dish, cover and chill.
- Can be served with shrimps or Japanese cucumber on the side.
Number of Servings: 6 to 8
Celery can be added to this salad dish for added crunch. Just dice and boil. Mix in with all ingredients during preparation stage.

Sunday, December 6, 2009 at 10:39 PM
Posted by Vivian in
Local,
Noodles
This is an extremely overdue post which I have been sitting on for weeks. I gave the excuse that I am flat out from all that is happening both at work and home front and I should cut myself some slack. Now that the busy November is over, Christmas tree is up and Christmas shopping and wrapping are done all within a week there is no more reason to continue to slack.
Because this was made so many weeks ago I cannot quite recall the exact ingredients that went in or the steps and there is nothing to make reference to only because everything was done based on gut-feel. But this is what and how I think it should be....
Ingredients:
- 300 gm fresh yellow noodles
- 300 gm fresh kway teow
- 100 gm fish cake (sliced diagonally)
- 4 eggs
- Few stalks of spring onion (cut into 2-inch length)
- Few cloves of garlic (minced)
- 4 Chinese sausages (sliced diagonally)
- 200 gm bean sprouts (tailed removed)
- Kecap manis
- Light soya sauce
Preparation:
- Blanched the noodles and kway teow slightly if they are not the fresh type to loosen the clumps.
- Heat wok and add oil, followed by garlic once the oil is hot.
- As soon as the garlic gets fragrant, stir in Chinese sausage and allow it to cook until the sausages release its aroma.
- Throw in bean sprouts, kway teow and noodles.
- Once the noodles and kway teow starts to cook, season with kecap manis and light soya sauce to taste. Mix well.
- Push the noodles to one side of the wok and add the eggs. Using the spatula, stir to break the eggs and quickly cover the eggs with the noodles.
- Add in spring onion 15 seconds later and give the noodles a quick stir to mix.
Number of Servings: 4
Wednesday, November 11, 2009 at 10:41 PM
Posted by Vivian in
Potatoes
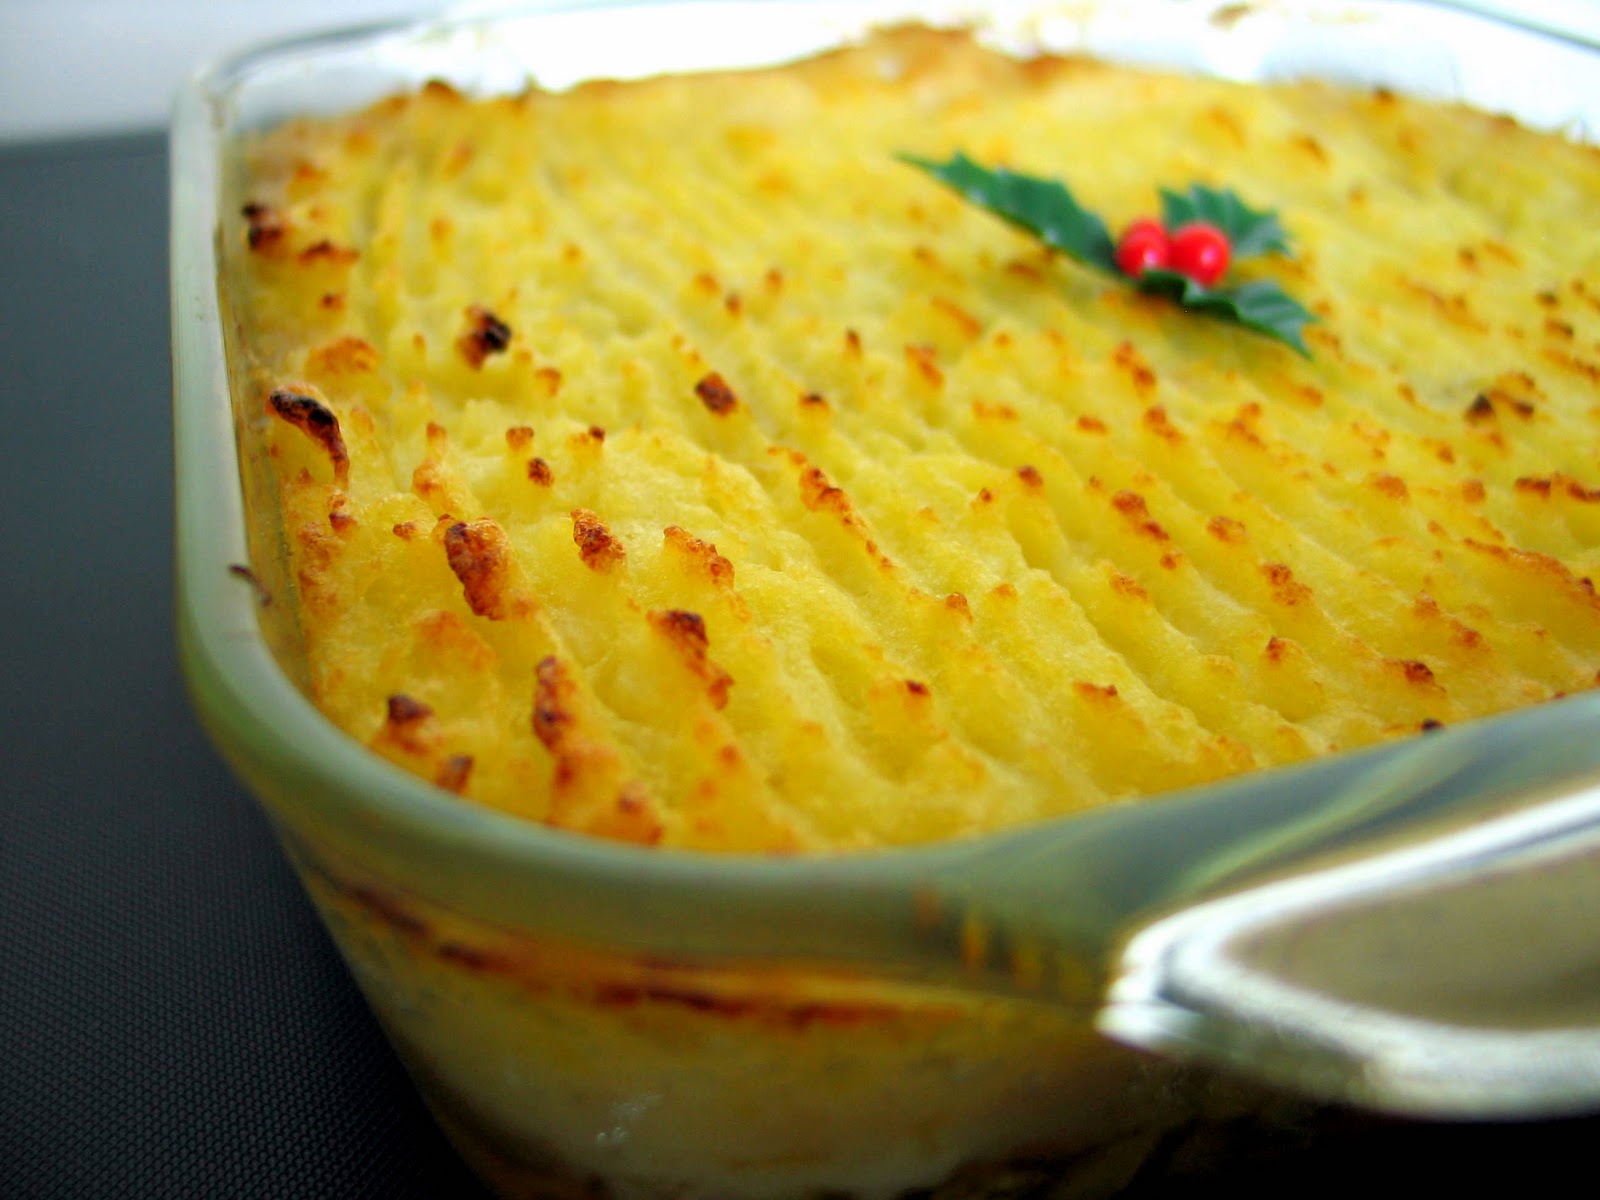
Had some leftover potatoes and carrots in the fridge bought 2 weeks ago and I really want to clear the stock before everything turned bad. The initial idea was try to my hands on making a cottage pie but was worried at the same time that Holland potatoes may not be the best potatoes for mashing since it is higher in sugar than starch. So when I saw
this recipe at The Little Teochew's blog, I immediately changed course.
A very simple dish but I went away with many lessons learnt:
(1) Have some good sense and never mix different types of potatoes together when cooking (I bought some loose USA potatoes because I wasn't sure if my leftover Holland potatoes was going to be enough to feed so many mounths and was glad that I did) because it becomes a challenge trying to manage the cooking time and making sure that the consistency was just right. The US potatoes turned out to be too soft by the time its cousin was done just right. I could tell who's who based on the colour!
(2) To reduce the cooking time, cover the pan with a slight opening for water vapour to escape and leave the potatoes to cook over medium heat. Turn the potatoes every few minutes to avoid charring. We need to brown it not char! The second batch was quite badly done because I walked away to tend to the children and in the end my 6-sided cubed potatoes all had 1 side that was almost burnt
(3) It is important to let the water vapour out if not the potatoes will start to "stew" in the water that had dripped back to the pan, making it hard to brown the potatoes and the potatoes will be slightly soggy as well.
(4) Never be too ambitious or lazy and attempt to cook too many potatoes in one go. The potatoes need to lay flat in one layer in order to get them all browning at the same rate.
But I must say that the rosemary leaves lended this dish a lovely smell. It is my first dealing with rosemary leaves as far as my own cooking is concerned and I have fallen madly in love with it. Time to go google for a rosemary chicken recipe.
Ingredients:
- Potatoes (cut into morsels)
- Rosemary leaves
- Olive oil
- Salt
Prepration:
- Heat pan and drizzle enough olive oil to cover the entire pan.
- Add in potatoes and rosemary leaves, making sure that all potatoes are in one layer.
- Cover pan, leaving a slight opening for water vapour to escape.
- Leave potatoes to cook over medium heat and giving them a flip every few minutes, until potatoes are soft enough to cut through easily
- Remove and sprinkle lightly with salt.
- Serve as a side-dish.
Number of Servings: Dependent on number of spud-monsters being served.
The Holland potatoes have a sweeter taste to it and holds up better in shape. Because of its natural sweetness salt can be omitted. Starchy potatoes require less cooking time and can do with some salt before serving.
Tuesday, November 10, 2009 at 11:18 PM
Posted by Vivian in
Chicken
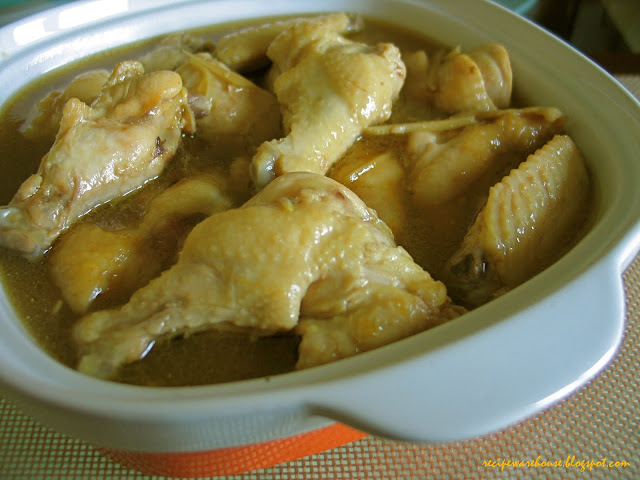
This was entirely an experiment and in my opinion wasn't quite successful (I am the worst critic of my own cooking!).
Though the taste isn't bad to the extend that it makes the chicken hard to swallow, I thought that it lacked the lemony taste which I was hoping to get. Not only that, it was slightly more salty than ideal... might have marinated the chicken a tad too long or perhaps had too much light soya sauce added. The proportion of the lemon juice and light soya sauce needs some adjustment for sure.
In any case this was what went into my "experiment"...
Ingredients:
- 6 chicken drumsticks (can be substituted with thigh or chicken wing)
- 2 tablespoons of honey
- 2 lemon (juiced and strained to remove pulp)
- 4 tablespoons of light soya sauce
Preparation:
- Mix ingredients and leave to marinate overnight.
- Bake at 180 degree Celsius for 30 minutes.
Number of Servings: 6
Monday, November 2, 2009 at 11:26 PM
Posted by Vivian in
Pasta
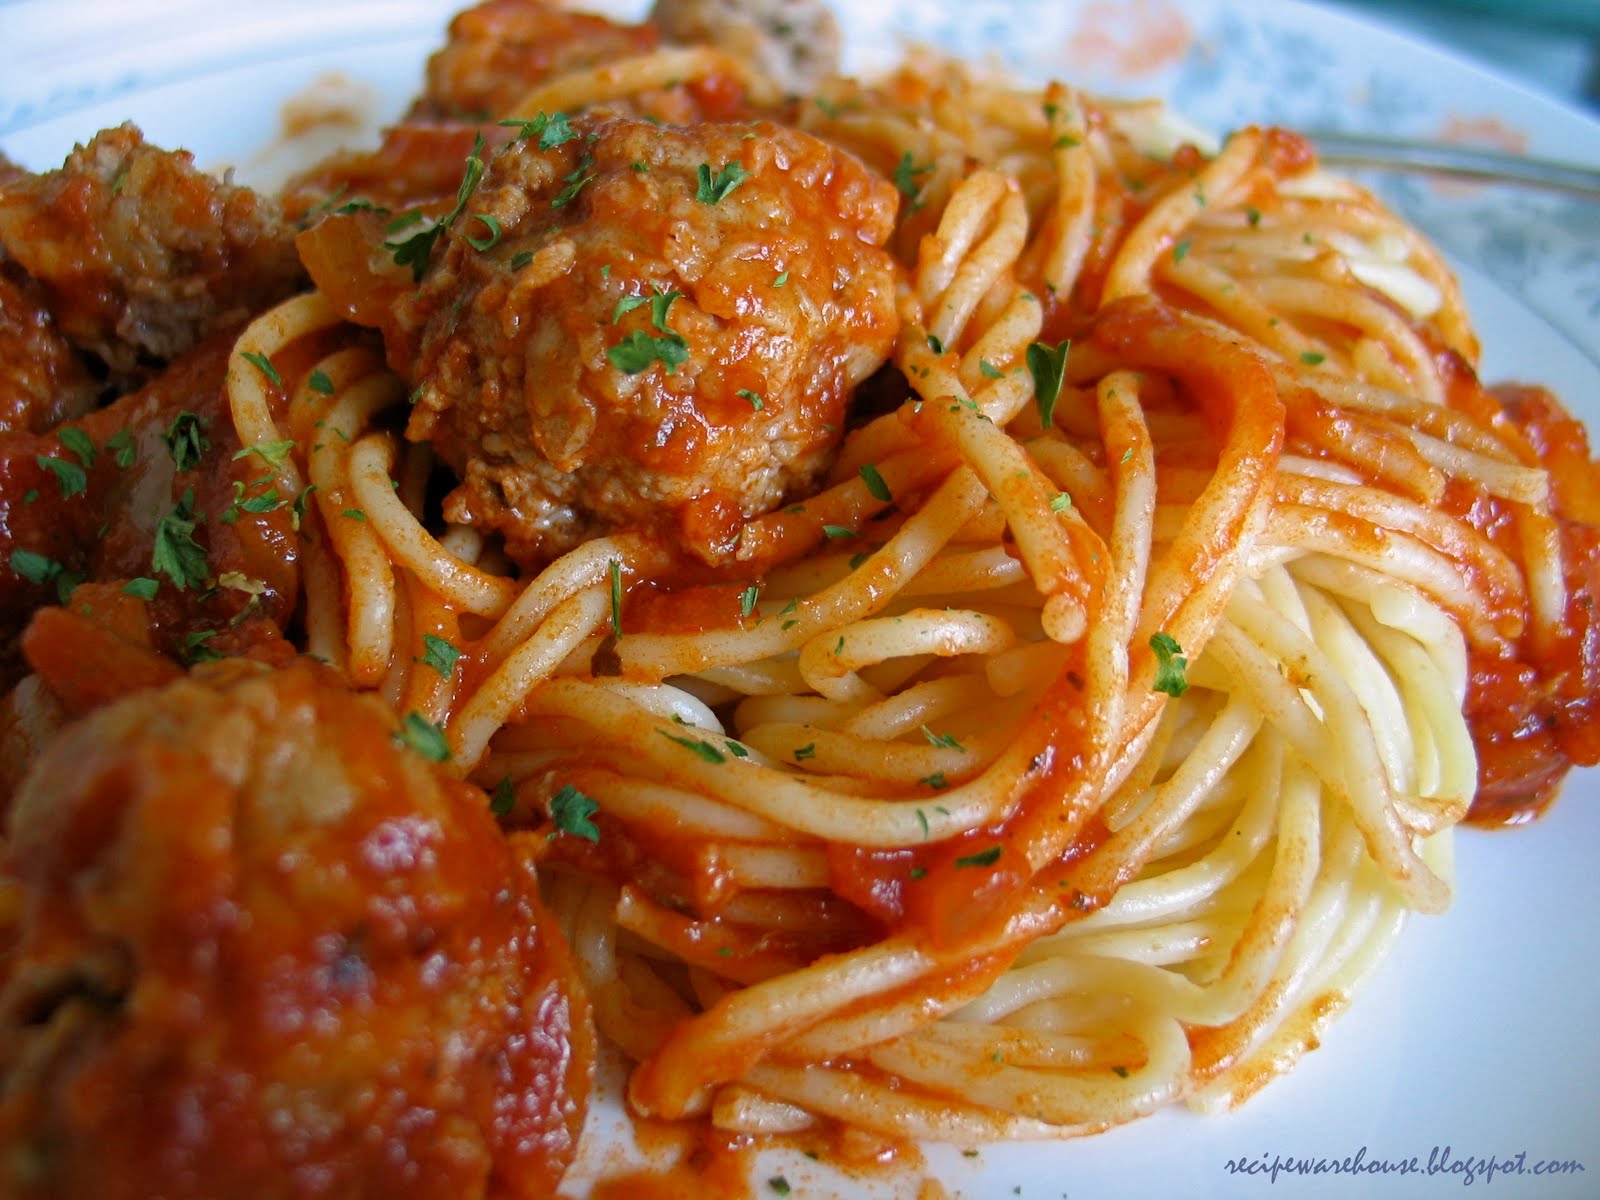
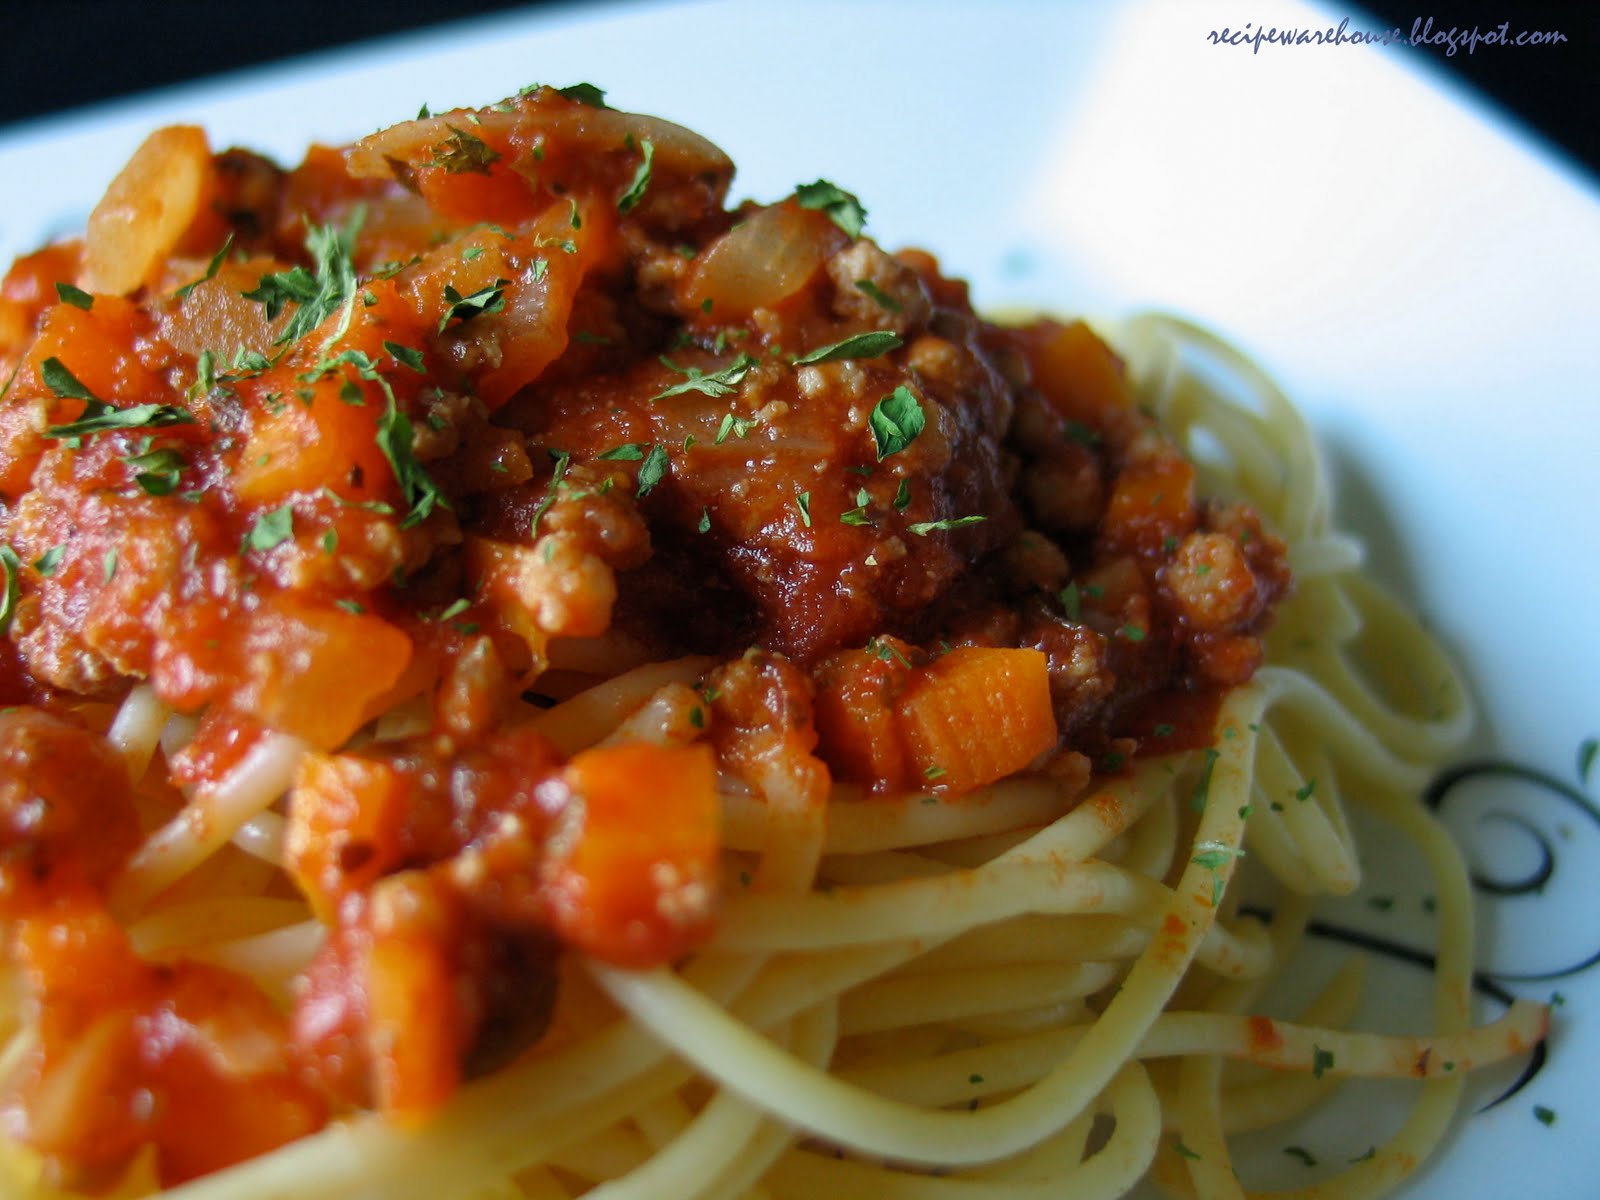
This was what we had for lunch on Saturday. What was planned for Saturday's lunch was a bowl of creamy mushroom soup and plate of warm pasta topped with tomato based sauce, with ham, onions and more mushrooms added on. So what the hell happened? Short answer is that I had a "misadventure" in the kitchen.
I should have known better and chucked the soup recipe long time ago. As usual, I try and go for the simple stuff but this one was a horrible mistake. The soup was no where near creamy the first time I tried it... so I decided to attempt it again on Saturday and ended up having more cream. The proportion was way way way off. I could only taste the cream and there was just not enough mushrooms to it. It turned out to be worse than the first attempt. I started to panic like hell seeing how I had ruined the soup and lunch time was nearing. Hungry men are angry men, hungry children are beyond imagination. I had to turn the whole situation around quickly to redeem myself. The first idea that came to mind was to turn the pot of soup into pasta sauce and so I went with it, keeping my fingers and toes crossed, hoping for the best.
By the time I served up lunch, I was adamant that it was crap even before I tasted it. But after I plucked up the courage and took the first bite I had to congratulate myself that it actually wasn't that bad. Except I still think onions in cream sauce renders it a weird taste.
This is probably how I should go about with this dish the next time (after I recover from this terrible espisode!)...
Ingredients:
- 3 portobello mushrooms (finely diced)
- 20 swiss brown mushrooms (sliced)
- 300 ml thicken cream
- 500 ml chicken stock
- 2 cloves of garlic (minced)
- Pasta (pre-cooked)
Preparation:
- Heat oil in frying pan and add in garlic. Stir-fry till fragrant.
- Add in portobello mushrooms and allow it to cook until juices start to run.
- Add in swiss brown mushrooms.
- Once the mushrooms are thoroughly cooked, pour in chicken stock slowly.
- Allow the mixture to come to a boil and low heat slightly.
- Stir in heavy cream and bring it to a simmer.
- Serve sauce over pasta, with parsley flakes and freshly grounded black pepper for an added kick.
Number of Servings: 4
Sunday, November 1, 2009 at 11:47 PM
Posted by Vivian in
Chinese,
Soup
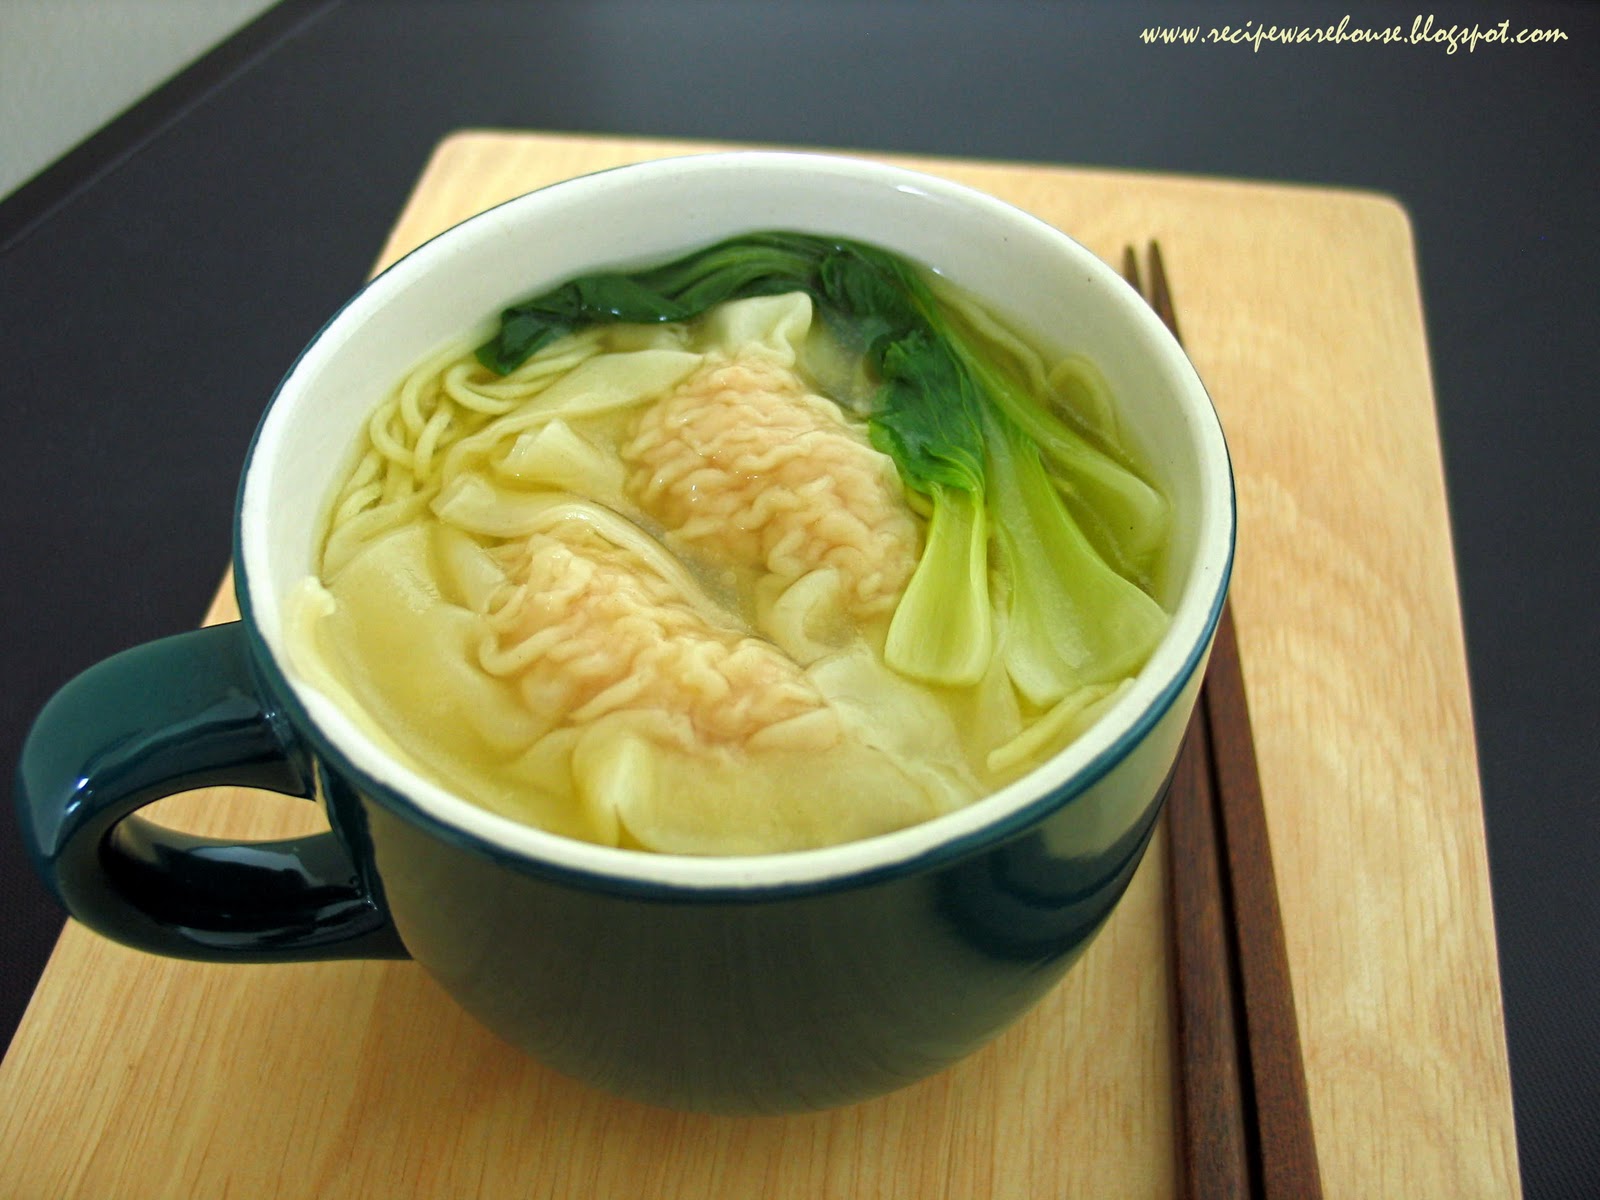
The above is a bowl of fuss-free, no frill, idiot-proof soup. Simple but oozing from it is nothing but flavour, goodness and natural sweetness. Good with a bowl of steaming white rice and even when eaten on its own.
I admitted that because I am such a spud lover, I had added in a tad too much potatoes in the soup today. Taste-wise, of course it has to be the more the merrier. But I can't say that it did much good to my waistline by the time I wiped out the entire pot LOL.
Ingredients:
- 300 gm of pork ribs
- 1 stick of carrot (skinned and cut into 1 inch thick)
- 3 mid-size potatoes (skinned and cut into 1 inch thick or into wedges)
Preparation:
- Bring a small pot of water to boil and add in the pork ribs.
- Allow pork ribs to boil for 3 to 4 mins to remove the scum.
- In the meantime, bring another bigger pot of water (about 1.2 litre) to boil and transfer the pork ribs from the smaller pot to the bigger pot.
- Throw in potatoes and carrots.
- Allow soup to boil for 10 to 15 minutes before lowering heat to medium-low.
- Leave the soup to brew for another 30 minutes before serving.
Number of Servings: 4
Sunday, October 25, 2009 at 11:32 PM
Posted by Vivian in
Pasta
When I first set eyes on the tempting photos taken by
The Little Teochew, I was so enticed to give this a try. But I should have known better that me being a not so great fan of cheese found the taste of Gorgonzola Dolcelatte too strong to my liking. I ended up topping the pasta with tons of black pepper and parsley flakes to mask the smell. Kai Koon took to it better but it was so rich that it left him so full from the lunch that he specifically asked to have something light for dinner. Can't fault the recipe. I am sure someone who enjoys cheese will find this an interesting dish.
For the next round (yes I am still brave enough to give it another shot!) I will replace it with a different type of cheese, something milder for this uncouth palate of mine.
Ingredients:
- 2 cloves of garlic (minced)
- 80 gm of Gorgonzola Dolcelatte (roughly chopped)
- 6 tablespoon of grated Parmesan
- Butter (about 100 gm)
- 1/2 cup cream
- Pasta (pre-cooked according to instructions)
Preparation:
- Heat 1 tablespoon of oil in and add garlic thereafter.
- Add in cream and turn off heat once it starts to simmer.
- Stir in cheese and allow it to melt completely
- Add in butter. Continue to stir to create a smooth mixture.
- Toss pasta and sauce together and top with black pepper.
Number of Servings: 4
Monday, October 19, 2009 at 10:56 PM
Posted by Vivian in
Seafood
This is a really simple recipe that Diana had shared with me a while ago. So simple that it doesn't require a lot of effort, time and ingredients to put the dish together, but the end result is mouth-watering enough to pass-off as something that the cook had slaved over the stove-top (oven rather). The disappointing part was that the prawns I got last week wasn't fresh enough to do more justice to the taste.
Oh yes... this dish reminded me of another recipe from my mum which also had tons of garlic (enough to make you smell the after-breath from miles away) and a sinful amount of butter to it. The difference is that the butter is made into sauce.
Ingredients:
- 800 gm of prawns (whiskers trimmed off)
- Generous knob of butter (I used about 80 gm)
- 8 cloves of garlic (minced)
Preparation:
- Mixed all ingredients together and allow to stand for 30 minutes. (I had cut the butter into morsels and left them on top of the prawns next to a pot of boiling water to hasten the melting process!).
- Bake prawns for 8 to 10 minutes at 180 degree Celsius.
Number of Servings: 3 to 4
Sunday, October 11, 2009 at 11:47 PM
Posted by Vivian in
Chinese,
Rice

Finally something new to add to this blog! I have been in a "recycling mode" for the last 2 months due to lack of time either because of work or other commitments during the weekends. And when that happens, the inclination is to go for dishes that I can whip up without much thinking and with eyes closed. The maid being on home leave for 2 weeks added to that need since I had to juggle all the other household chores alone.
There are many variations to how a fried rice can be done. The ingredients can range from peas, corns, carrots, ham, luncheon meat, button mushroom to pine nuts. The list is contained only by one's imagination. For me, I still like it the the way my mum does it - char siew, Chinese sausage, eggs and spring onion. Perhaps I am bias because I grew up eating her fried rice and to me that is how it should be. I even recall that the zhi char stall had their fried rice done this way back when I was just a kiddo. It was only in the recent years that I started to see all sorts of ingredients being added to it.
When it comes to my fried rice, I am very anal
Ingredients:
3 cups of jasmine rice (cooked and left in fridge overnight)
3 cloves of small onion (finely chopped)
3 cloves of garlic (finely chopped)
5 stalks of spring onion (finely chopped and white colour end separately set side)
200 gm char siew (finely chopped)
2 Chinese sausage (case removed and finely chopped)
1 stick of carrot (finely chopped)
4 eggs (beaten and seasoned with light soy sauce)
Light soy sauce
Dark soy sauce (optional)
Preparation:
Heat 3 tablespoons of oil in wok.
Add garlic and onion to wok.
Once fragrant, mix in white end of the spring onions and allow the mixture to cook slightly.
Add in Chinese sausage and carrot.
Stir-fry Chinese sausage to almost 90% cooked.
Add in egg and continue to stir to create a scramble-liked texture.
While the egg is still a little runny, add in rice.
Break up any lumps of rice and mix thoroughly with ingredients in the wok.
Mix in char siew and spring onion.
Drizzle some dark soy sauce for added colour to rice (optional)
Season with light soy sauce to taste.
Number of Servings: 4 to 5
Monday, August 24, 2009 at 11:46 AM
Posted by Vivian in
Noodles,
Seafood
Ingredients:
- 4 bundles of egg noodles
- 200 gm of crabmeat
- 200 gm of shrimp (shelled and de-veined)
- 4 bunches of bak choy (cut into 1 inch long)
- 3 cloves garlic (minced)
- 4 tablespoons corn flour
- 2 cups chicken broth
Preparation:
- Pre-cook noodle and run under water to remove starch
- Heat up wok and add 2 tbsp of cooking oil.
- Add about 4 tbsp soy sauce into the wok.
- Add the noodles in and stir-fry around briskly. Few drops of sesame oil can be added for fragrance.
- Remove the noodles once well-coated and set aside.
- Using the same wok, add about 1 tbsp cooking oil and then stir-fry the shrimp and crabmeat till cooked.
- Put the noodles into the wok, and stir around to distribute the seafood evenly.
- Remove from wok and set aside.
- Mix the chicken broth and corn flour together in a small bowl.
- Heat about 1 tbsp cooking oil and saute the garlic till fragrant. Quickly pour in the mixture and add the bak choy to the mix. Bring to a boil.
- Add a splash of soy sauce for flavour. (A beaten egg can also be added to the gravy).
Number of Servings: 4
at 11:42 AM
Posted by Vivian in
Chinese,
Soup

The verdict for this soup – thumbs up from the big people and thumbs down from the little people. I suppose Matty and Elaina are so used to drinking clear soup since young that to them soup should be that way. Really love this soup but I guess until the kids acquired the taste of drinking creamy soup I probably won’t be dishing this out anytime soon.
Ingredients:
- 1 can of creamy corn kernels (about 300 grams)
- 1 litre of chicken stock
- 100 gm crabmeat (washed and pat-dry)
- Shaoxing wine
- 2 egg white
- 1 tablespoon of corn flour (mixed with small bowl of water)
Preparation:
- Heat oil in wok and stir-fry crabmeat.
- Add in some shaoxing wine to crabmeat.
- Add in creamy corn and chicken stock.
- Season with some white pepper and salt to taste.
- Reduce heat slightly and stir in cornstarch.
- Add in egg white, giving it few quick stirs to break it up.
Number of Servings: 4
at 11:36 AM
Posted by Vivian in
Local,
Noodles

Wonder what is wrong with Blogger, each night I will log in to try my luck, but the user interface has gone from bad to worse. At least it doesn’t seem to work with Safari and Windows Vista, but with Windows XP it was business as usual. Because of that I haven’t been able to update my blogs for a long long long time. I am getting desperate and have to resort to posting some of my overdue posts in the office which is still running on Windows XP.
Anyway, this is one dish that I didn't really like how it turned out. There were no cockles, Chinese sausage and lard. In not so many words... not sinful enough!
Frankly, when I set my mind on trying the recipe it didn't dawn on me that these crucial ingredients were missing until 10 minutes before I was about to whip it up. The silliest part was that I actually had another book carrying the same recipe (albeit better). It was then did I really regret not scouring through all my resources - poor resource management. It’s ok, the next opportunity is not too far off in the future!
Thursday, August 13, 2009 at 3:21 PM
Posted by Vivian in
Chinese,
Seafood,
Vegetable

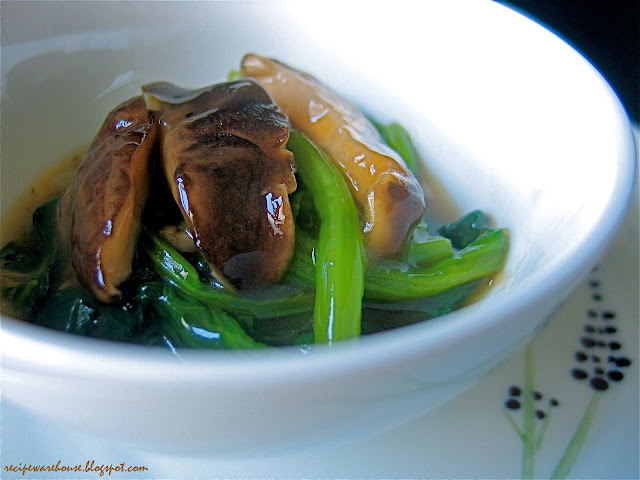
Quite honestly I am starting to run out of ideas for one-dish meal and because now that I am starting to get more organised when it comes to meal preparation, I do find myself attempting to put together a typical home-cooked Chinese meal more frequently, that consists of rice and 2 or 3 dishes.
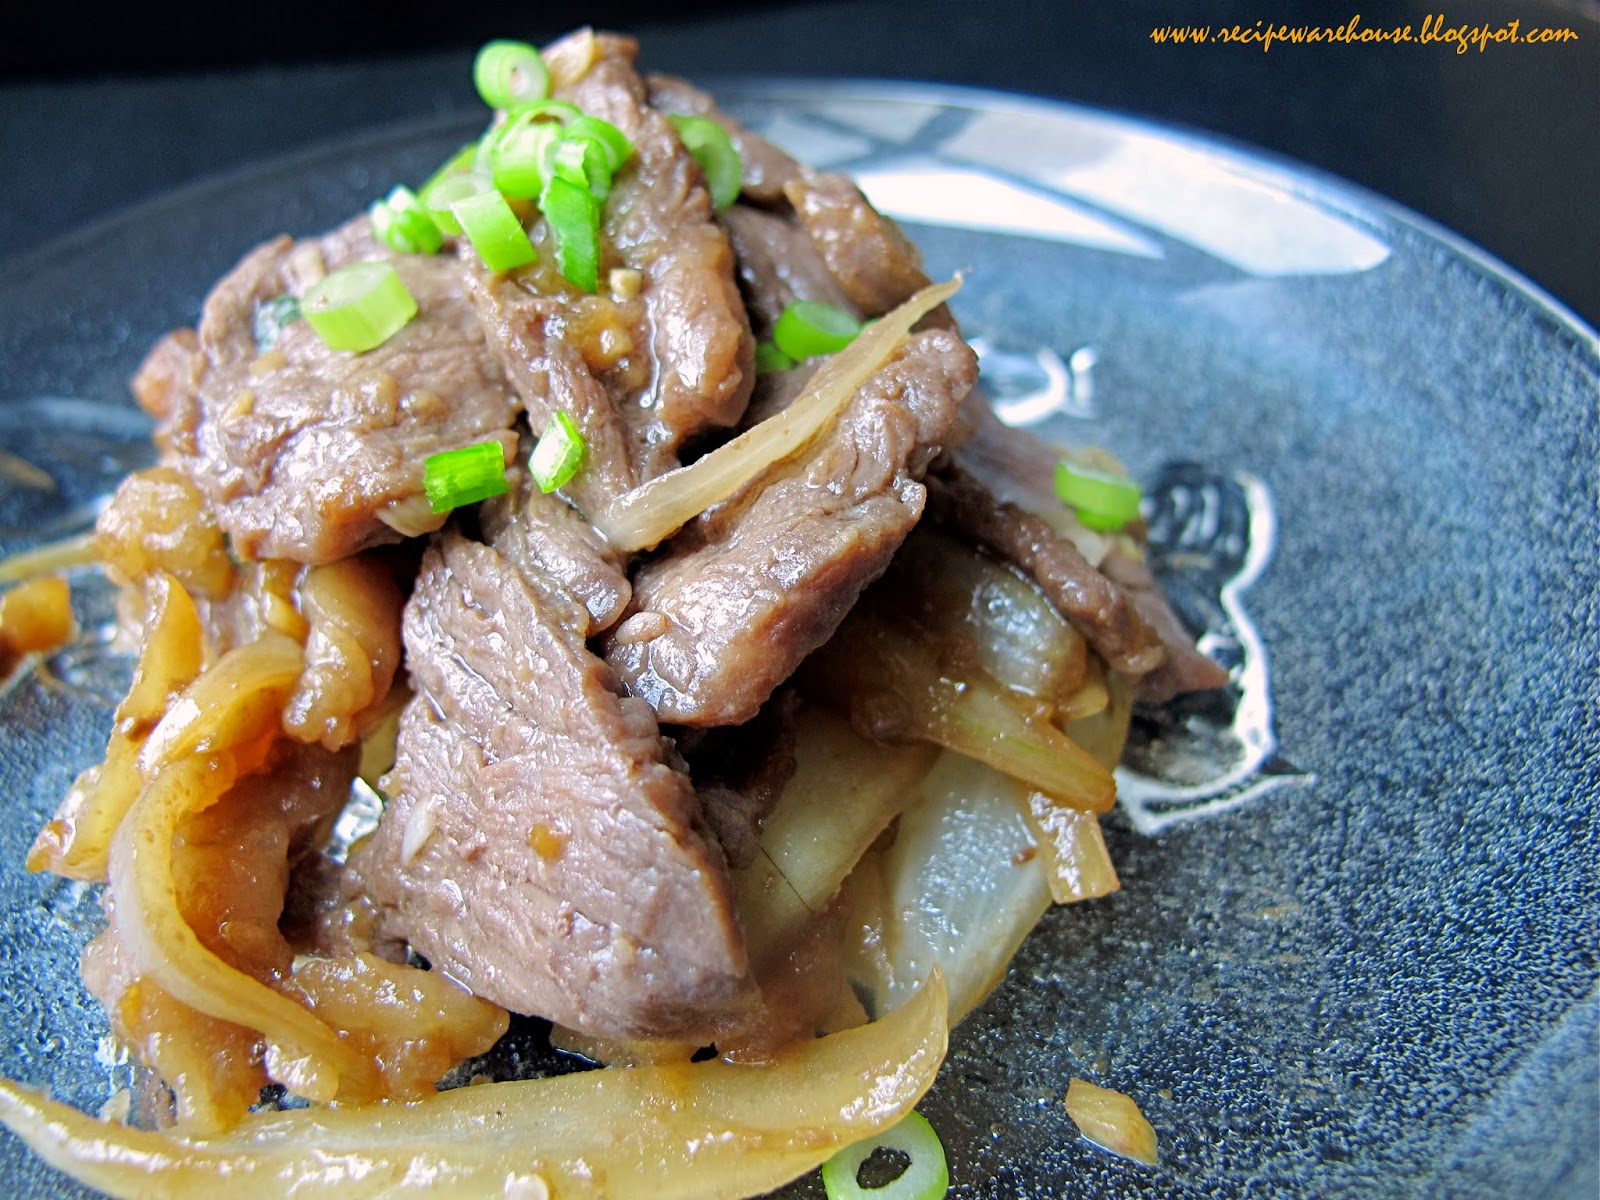
This is an idiot-proof recipe that can be easily whipped up and taste like something you order from a Chinese restaurant. In my opinion, anything that has oyster sauce usually won't go wrong....
Ingredients:
- 1 kg prawn (peeled and de-veined, with tail left intact)
- 3 cloves of garlic (diced)
- 1 kg broccoli (cut into florets)
- 1/2 cup of water
- 1 tbsp cornflour
- 2 tablespoon oyster sauce
- 2 tablespoon light soy sauce
- 1 teaspoon sesame oil
Preparation:
- Combine cornflour with water and mix to a smooth paste.
- Add oyster sauce, light soy sauce and sesame oil to cornstarch and mix well.
- Partially blanch broccoli in boiling water and set aside to drain Heat oil in wok and stir-fry prawns with some garlic.
- Remove prawns from wok when it is about 80% done and set aside.
- Add remaining garlic and broccoli to wok and stir-fry broccoli.
- Pour cornflour mixture to the wok and mix through.
- Add prawns and cook until heated through.
- Serve hot with rice.
Number of Servings: 4
Monday, July 6, 2009 at 12:14 AM
Posted by Vivian in
Japanese,
Noodles,
Soup

I admit that before this, I had always thought that miso soup was simply miso paste mixed with boiling water. Good thing that I wasn't overly confident and checked the web for its recipe. Instead of water, it should be dashi plus miso paste.
I also found out the difference between red miso paste and yellow miso paste. The former contains more salt and is therefore more salty than the latter.
Ingredients:
- 200 gm udon
- 4 cups of dashi soup stock
- 1/3 cup of miso paste
Preparation:
- Bring dashi soup stock to boil.
- Using a small bowl, ladle some dashi over miso and mix to get a smooth paste. This is to prevent lumpy miso floating in the soup later.
- Turn down heat and add in miso.
- Allow the soup to simmer. Do not let the soup boil as the miso taste will dissipate.
- Serve miso soup over pre-cooked udon.
Sunday, July 5, 2009 at 11:54 PM
Posted by Vivian in
Chicken,
Japanese

The title of this week's post should really be "Chicken Porridge" because that was what I had initially planned to make. Both Matty and Elaina came down with stomach flu on Thursday, just one day after Matty's birthday. In a way I had to count ourselves lucky that it didn't happen on Matty's birthday, otherwise he will be very disappointed for not being able to celebrate his birthday.
Decided that I should change the menu because the kids went back to their normal diet by Friday dinner and were doing fine by then. If I were to cook the boy porridge on Saturday, be sure that there will be some unhappiness in the family.
And I really need to start picking up some tips on pan-frying. Tried doing it with fish and it turned out to be a disaster. Even with chicken thigh, I only managed to get 2 out of 6 nicely done. The other 4 didn't turn out too well.
Ingredients:
- 6 chicken thigh (de-boned)
- 6 tablespoons of teriyaki sauce
- 3 tablespoons of honey
Preparation:
- Marinade chicken with 3 tablespoons of teriyaki sauce and leave in fridge overnight.
- Mix together 3 tablespoons of teriyaki sauce and 3 tablespoons of honey.
- Using a non-stick pan, pan-fry chicken thigh skin side down until it has browned evenly.
- Turn chicken over to the other side and do likewise.
- Cook chicken thoroughly and drizzle teriyaki-honey mixture over chicken.
Number of Servings: 6
Tuesday, June 30, 2009 at 12:12 AM
Posted by Vivian in
Italian

The "recipe" for the above is really simple - one Fisherprice linka-doo with a watering can cover stuffed right in the centre. Voila, and we have a "pizza" ready to be served. The kids and I came up with this "recipe" long time ago in the bathtub while I was washing them up. Matty even added that the little holes of the watering can cover are pepperonis. Though the "pizza" is unlikely to score any points in the taste department, we definitely deserve a distinction for creativity.
Anyway, back to some real pizzas!!
2 weekends ago while making some plastic pizzas in the bathtub, Matty asked if I could make him a real pizza. The last time I attempted putting pizzas on the kids' plate was almost a year ago and it wasn't well-received by Elaina. I stopped whipping it up again. After slogging hard in the kitchen to cook up a meal, the last thing I want is a child who pushes the food around the plate. It was with a lot of courage that I promised Matty we will have pizzas for the following weekend.
Pizza is a really versatile dish and almost anything can be used as a topping. Even the base can be either freshly home-made, frozen crust from the supermarket, pita bread or simply sandwich bread.
My dad once told me that if the base is freshly made, I should bake it slightly first before adding the toppings. This way it will prevent the toppings from burning (since it will take longer for the base to cook as opposed to the toppings). This will have to be a mental note for now. I wasn't prepared to knead the dough without the help of a bread making machine or mixer. Time is precious in my case.
A question sparked late last week while I was picking up the frozen crusts. The instructions on the packaging said to spread the tomato paste first and then cheese. Other toppings to follow. In the past, I have always had the cheese last. So which should be the way? I did a search on the internet (my guru for everything!) and came upon this site that talked about nothing but pizzas. Apparently, this is the right order:
- Tomato paste
- Cheese - to hold the toppings down and to keep the base moist
- Other toppings
- Cheese - to cover the toppings and keep them moist
I took the advice. I had mozzarella cheese as the first layer of cheese and lastly I topped the pizzas with cheddar cheese. Of course, common sense told me that after the first layer of cheese, toppings like ham and pepperoni went next since they are flat and other toppings which included the mushrooms, onions and pineapples came after that, intricately balanced on the ham and pepperoni.
This was the final product that made it to our dining table (and fortunately Elaina had no issues this time round) ...
Monday, June 22, 2009 at 11:21 PM
Posted by Vivian in
Chinese,
Noodles,
Pasta

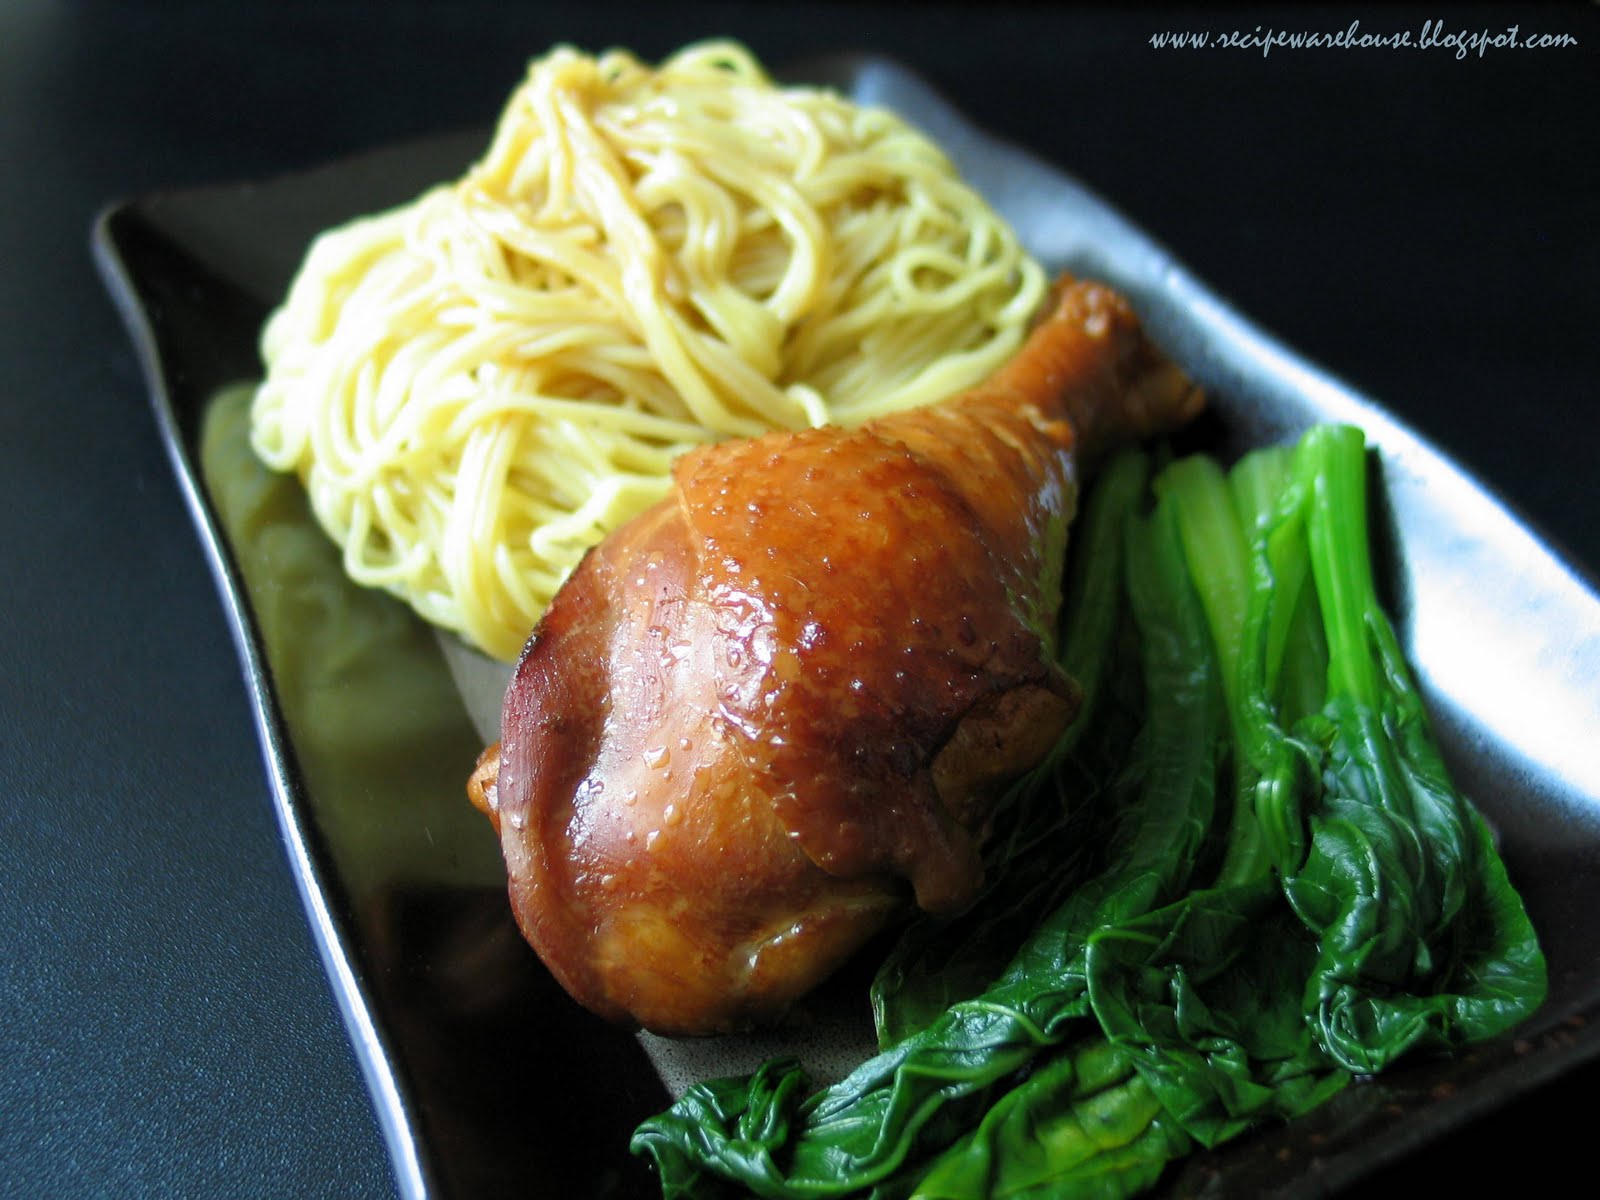
Matty came down with a slight flu last Thursday and I decided that I shall cook something soupy for him over the weekend.
On top of wanting to go easy with the boy's digestive system, after 2 full weeks of meal planning and meal preparation I really want to go easy on myself as well. "Keeping it simple" was the operative word. But to prevent someone going on hunger strike because the food wasn't exciting enough for his palate, I jazzed up the boring macaroni in chicken soup and came up with this (which didn't turn out to be quite as simple in the end!)....
Ingredients:
- 4 chicken thigh (with bone-in)
- 2l of water
- 5 dried Chinese mushroom (soaked overnight and cut into thin strips)
- Half a stick of carrot (cut into thin strips)
- 50 gm Xiao Bai Cai (cut into thin strips)
- 200 gm dried elbow pasta (pre-cooked)
- 5 tablespoons of corn flour
- 200 ml of water
- 2 tablespoons of light soy sauce
- 2 tablespoons of oyster sauce
- 2 teaspoon of sesame oil
- 2 eggs (beaten)
Preparation:
- Bring 2l of water to boil and add in chicken.
- About 10 minutes into cooking, add in dried mushroom
- Continue to let the soup simmer for another 10 minutes or until the chicken is thoroughly cooked.
- Season soup with a bit of salt.
- Remove chicken and mushroom from the soup
- Strain the soup and set aside.
- Shred chicken using finger tips and discard the bones.
- Bring soup to boil again and add in green vegetable and carrot.
- Mix in chicken and mushroom when the vegetables are almost done.
- Combine corn flour with 200 ml of water and mix thoroughly. Add in oyster sauce, light soy sauce and sesame oil, and stir well.
- Turn down the heat to slightly lower than medium and stir in corn flour mixture to soup.
- Once the soup has thicken, turn off heat and pour in beaten egg. Give a stir or 2 to break the egg up.
- Serve soup over precooked elbow pasta
Number of Servings: 4
Sunday, June 14, 2009 at 11:57 PM
Posted by Vivian in
Italian,
Pasta

Attempted this the 2nd time today and definitely think that it tastes much better. Not sure if it is because I adjusted the amount of sour cream down, or because I had used the Campbell's premium cream of wild mushroom as opposed to the normal cream of mushroom, or maybe because I was less pressed for time and could do a better job. But I have to say that a rush job (including cooking) usually delivers result less than satisfying.
Ingredients:
- 200 gm spiral pasta (pre-cooked)
- 300 ml can cream of mushroom
- 200 ml sour cream
- 6 chicken fillet
- 250 gm broccoli (cut into small pieces)
- 1 cup fresh breadcrumbs
- 1 1/2 cup grated cheddar cheese
Preparation:
- Roast chicken fillet at 200 degree Celsius for 20 minutes.
- Roughly cut chicken into smaller pieces.
- Mix cream soup with 100 ml of water to thin consistency.
- Combine pasta, broccoli, cream soup, sour cream and chicken.
- Transfer mixture into an oven-proof dish and top with breadcrumbs and cheddar cheese.
- Bake at 180 degree Celsius for 25 minutes or until cheese has melted and top is golden brown.
Number of Servings: 4
at 11:29 PM
Posted by Vivian in
Chinese,
Pork

This is an extremely overdue post due to the lack of time and energy. The past week was simply crazy with the mother-in-law on a 2-week vacation and me having to play the role of a stay-at-home-mum on certain days and a working-mum on other days. Draining when I need to live 2 days in 1. One more week to go before life goes back to normal.
In a short span of 7 days, I have attempted making wontons twice. The beauty of this dish is that I can freeze the wontons after wrapping and simply throw them in boiling water minutes before serving, without even the need to thaw them. Simple enough for the maid to manage and I don't have to worry that the kids will be having the same menu for lunch (the maid lacks creativity when it comes to meal planning!).
Ingredients:
- 30 wonton wrappers
- 1 knob of fresh ginger (crushed)
- 200 gm minced pork
- 1/2 egg (beaten)
- 1 tablespoon shaoxing wine
- 1 teaspoon sesame oil
- 1 tablespoon light soy sauce
- Pepper
- 50ml cold chicken stock
Preparation:
- Soak crushed ginger in chicken stock for 5 minutes and discard ginger thereafter.
- Mix together minced pork, egg, sesame oil, light soy sauce and a dash of white pepper.
- Add chicken stock in stages while mixing.
- Place 1 teaspoon of filing in centre of wonton wrapper. Fold wonton skin diagonally and seal two sides together with a bit of water. Repeat steps for all wonton wrappers.
- Cook wontons in boiling water. Cooked wontons will rise to surface of water.
Number of Servings: 30 wontons
Monday, June 1, 2009 at 10:35 PM
Posted by Vivian in
Chicken

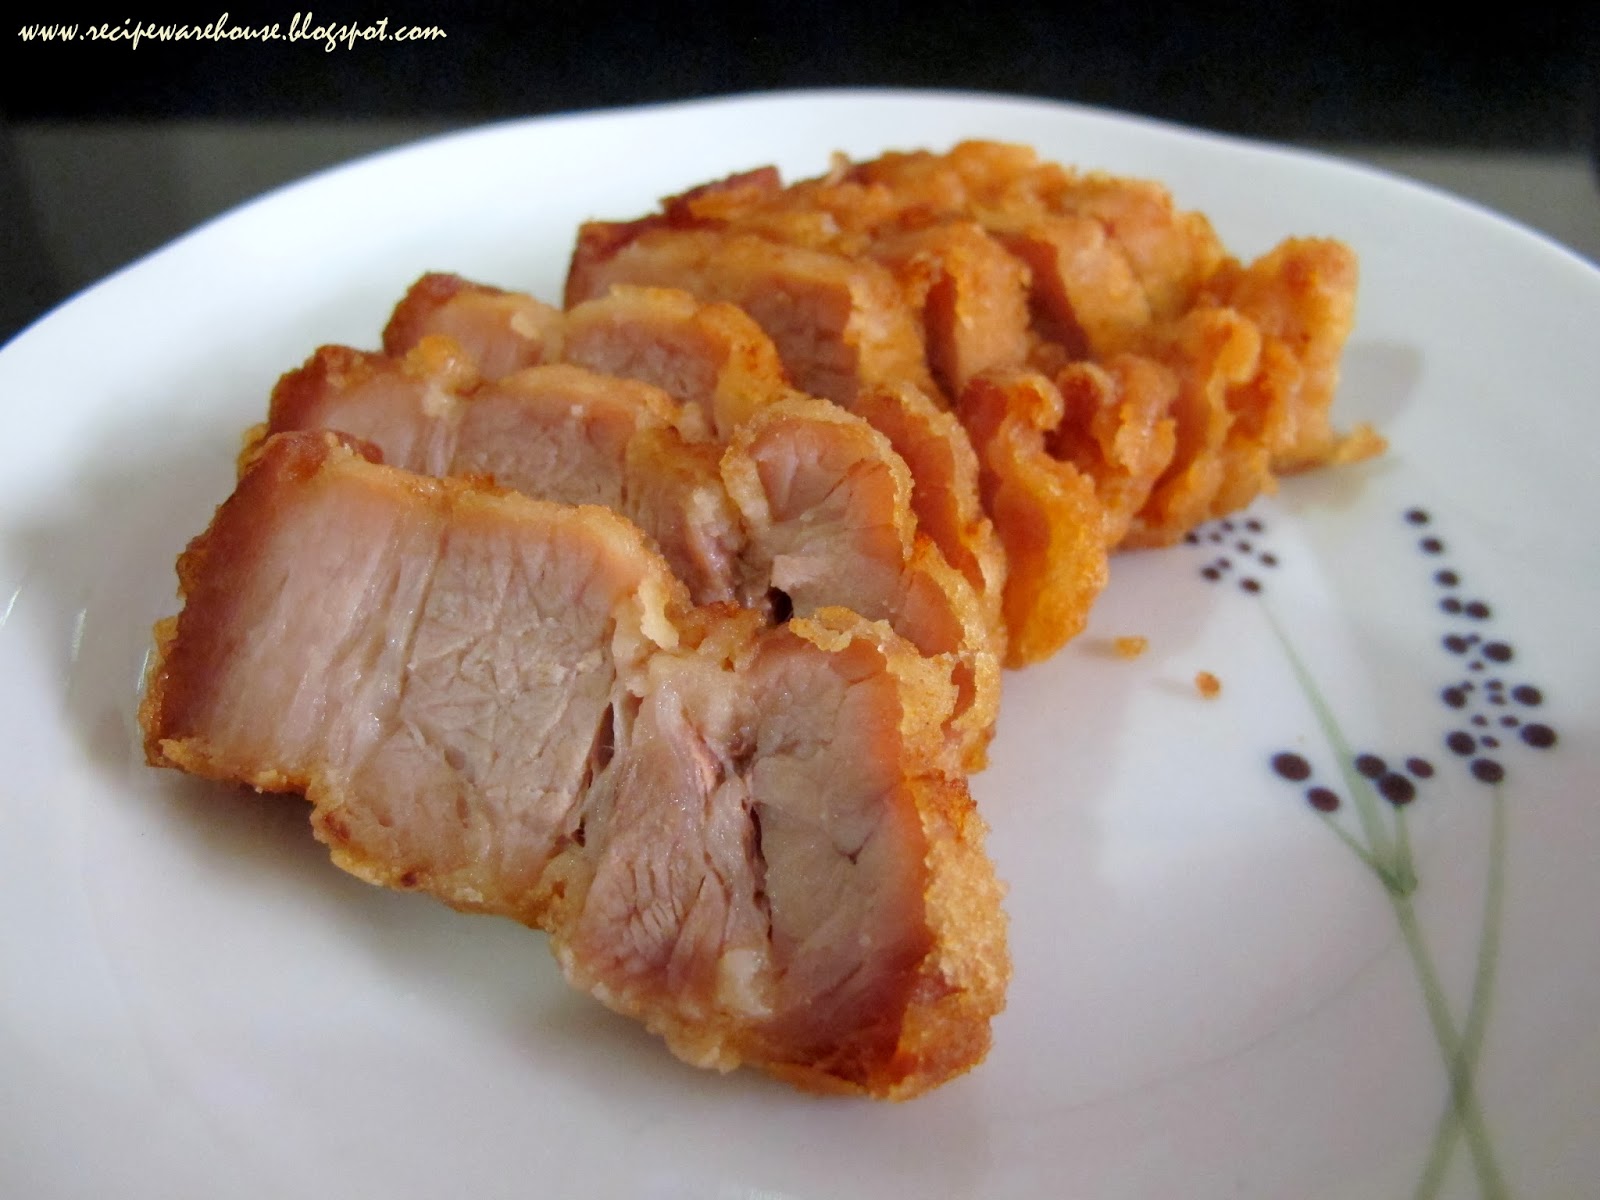
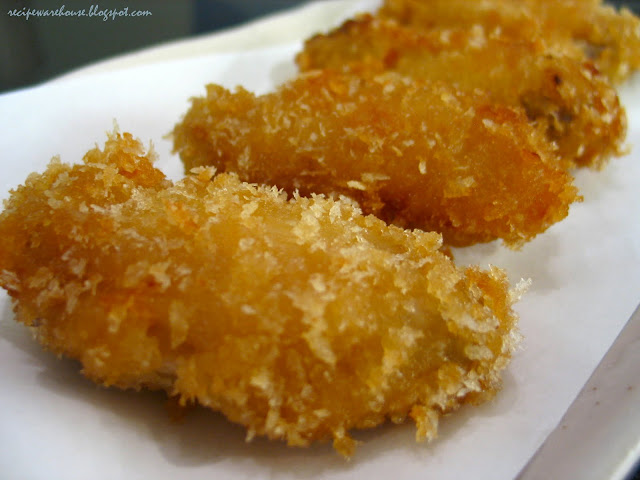
Crispy and savoury. Enough said! No lengthy write-up required on why this dish deserves a spot in this blog.
Ingredients:
- 1 kg mid-joint chicken wings (washed and drained dry)
- 1 egg white
- 4 tablespoons plain flour
- 5 tablespoons corn flour
- 2 tablespoons shrimp paste
- 1 tablespoon sesame oil
- 1/2 teaspoon pepper
- 1 tablespoon hua tiao wine
- 1 tablespoon sugar
- 1 tablespoon honey
Preparation:
- Mix shrimp paste, sesame oil, pepper, wine, sugar, honey and 1 tablespoon of corn flour together.
- Add in chicken wings to marinate for 1 to 2 hours.
- Stir in egg white and mix till well combine.
- Combine 4 tablespoons of plain flour and 4 tablespoons of corn flour. Mix well.
- Coat every wing evenly with flour mixture.
- Using medium heat, fry chicken wings until golden brown.
at 12:01 AM
Posted by Vivian in
Chicken

This recipe originated from a book titled "Just 5 Things". The very interesting part about this book is that all the dishes only require 5 ingredients. The recipes are extremely easy to follow as a result.
The original recipe serves the chicken with couscous but I had it replaced with pasta because I still haven't quite acquired the taste (or rather texture) of couscous.
Ingredients:
- 4 portions of chicken breast or thigh (de-boned)
- 2 oranges
- 2 tablespoons of honey
Preparation:
- Squeeze juice from orange and strain to remove pulp.
- Add honey to orange juice and mix well.
- Marinade chicken with mixture for at least 1 hour.
- Grill chicken on both sides until well-done.
(Chicken can be baked with oven. Brush chicken with olive oil before baking.)
Number of Servings: 4
Saturday, May 16, 2009 at 11:37 PM
Posted by Vivian in
Chinese,
Noodles

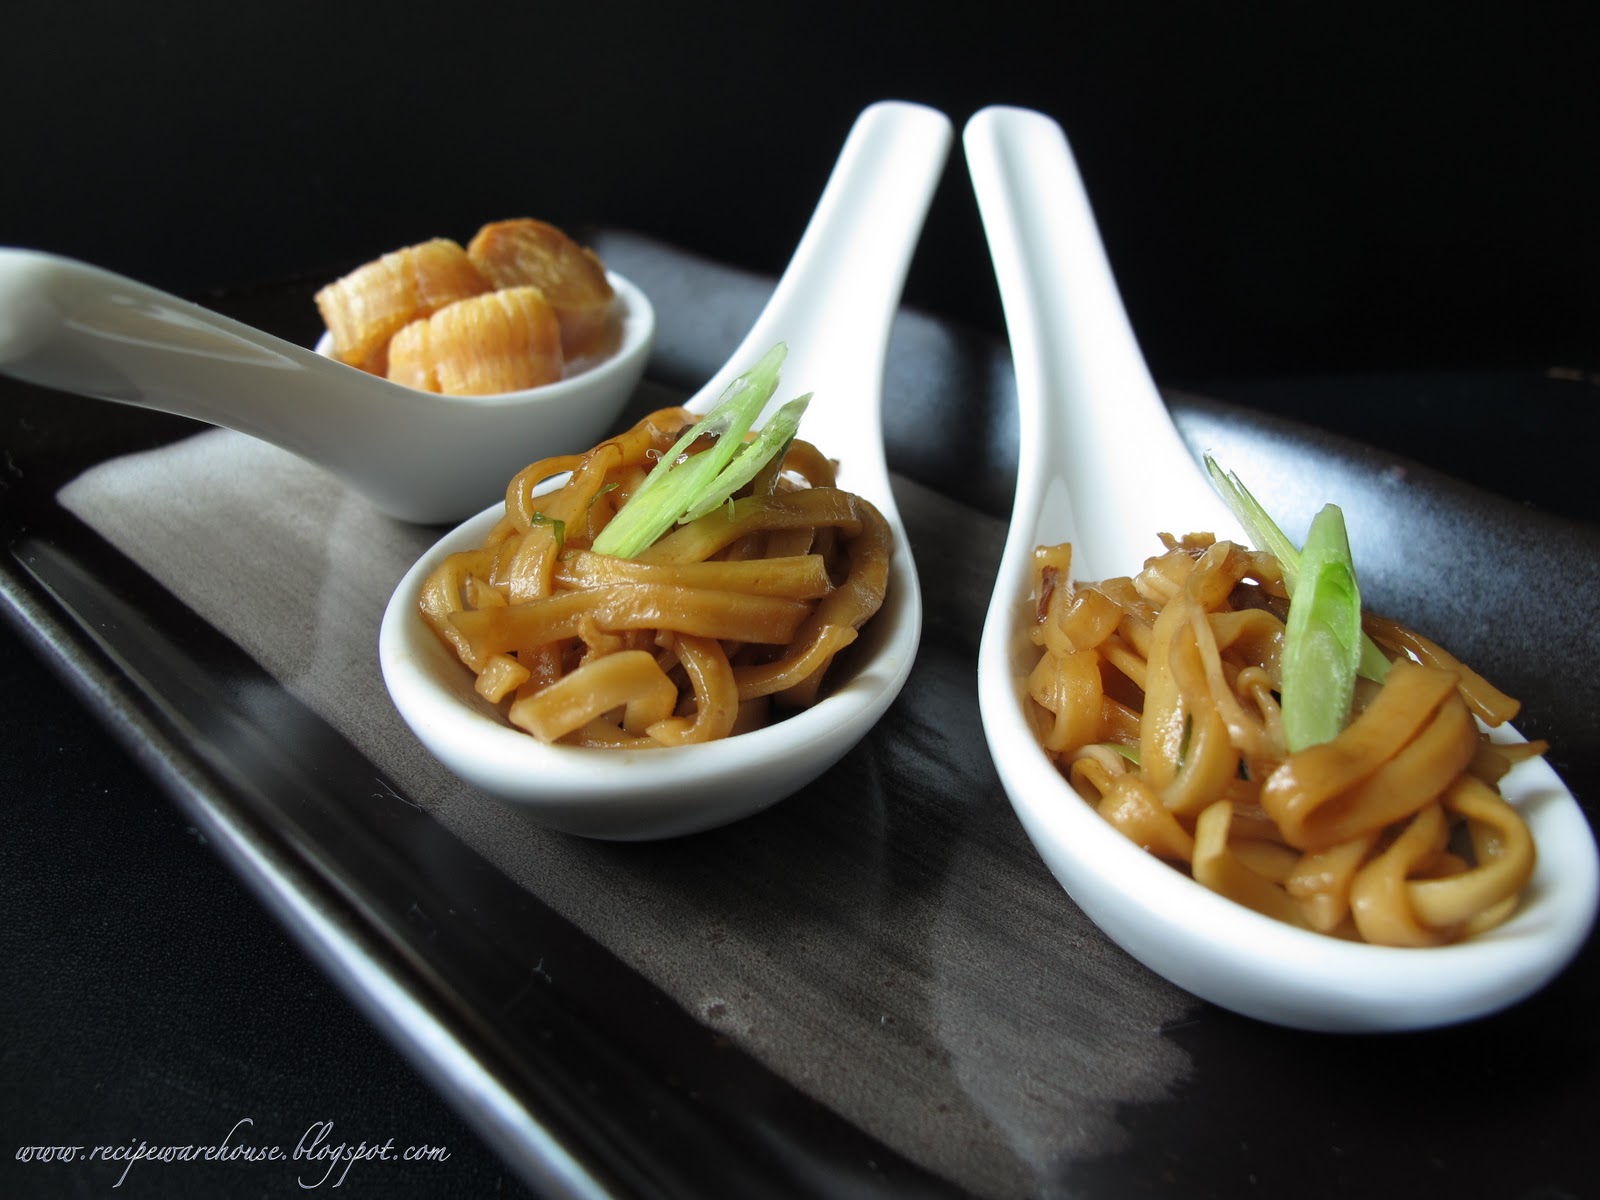
Earlier this week, I decided that I wanted to attempt to make some wontons but by a twist of fate the noodles has become the main subject of this post.
While unpacking the groceries that I brought home last night, to my horror the packet of wonton skins cannot be found. Not too sure what happened... might have left it at the checkout counter. Today was a chaotic day with the aircon cleaners swinging by to do the usual quarterly service and the delivery of our new television set. It was just too stressful having to drive out this morning to get a pack of wonton skins. I ended up blanching the minced pork and prawns to serve by the side.
What made me really pleased was the texture of the egg noodle that we had today. To think that it took me 10 minutes trying to decide whether to get that big bucket of Sau Tao brand egg noodles or some unknown brand but had only 5 servings in a pack which would just be enough for us. Because I know that Sau Tao brand's noodle will give me the desired taste of how a plate of Hong Kong style wonton noodles is suppose to be (based on prior experience from the instant noodles under this brand!), I decided that I shall bite the bullet and carted back the big bucket. No regrets and I look forward to dishing up more noodles with the wontons for sure!
Ingredients:
- 4 servings of Chinese egg noodles
- 2 tablespoons of sesame oil
- 2 tablespoons of light soy sauce
- 5 tablespoons of oyster sauce
Preparation:
- Mix sesame oil, light soy sauce and oyster sauce together.
- Divide mixture of sauce equally onto 4 plates.
- Bring 2 litres of water to boil and add in noodles.
- Use a pair of chopsticks to help separate the noodles and cook evenly until al-dente.
- Drain noodles and add noodles to sauce.
- Mix noodles with sauce thoroughly.
Number of Servings: 4
Monday, May 4, 2009 at 12:04 AM
Posted by Vivian in
Japanese,
Noodles
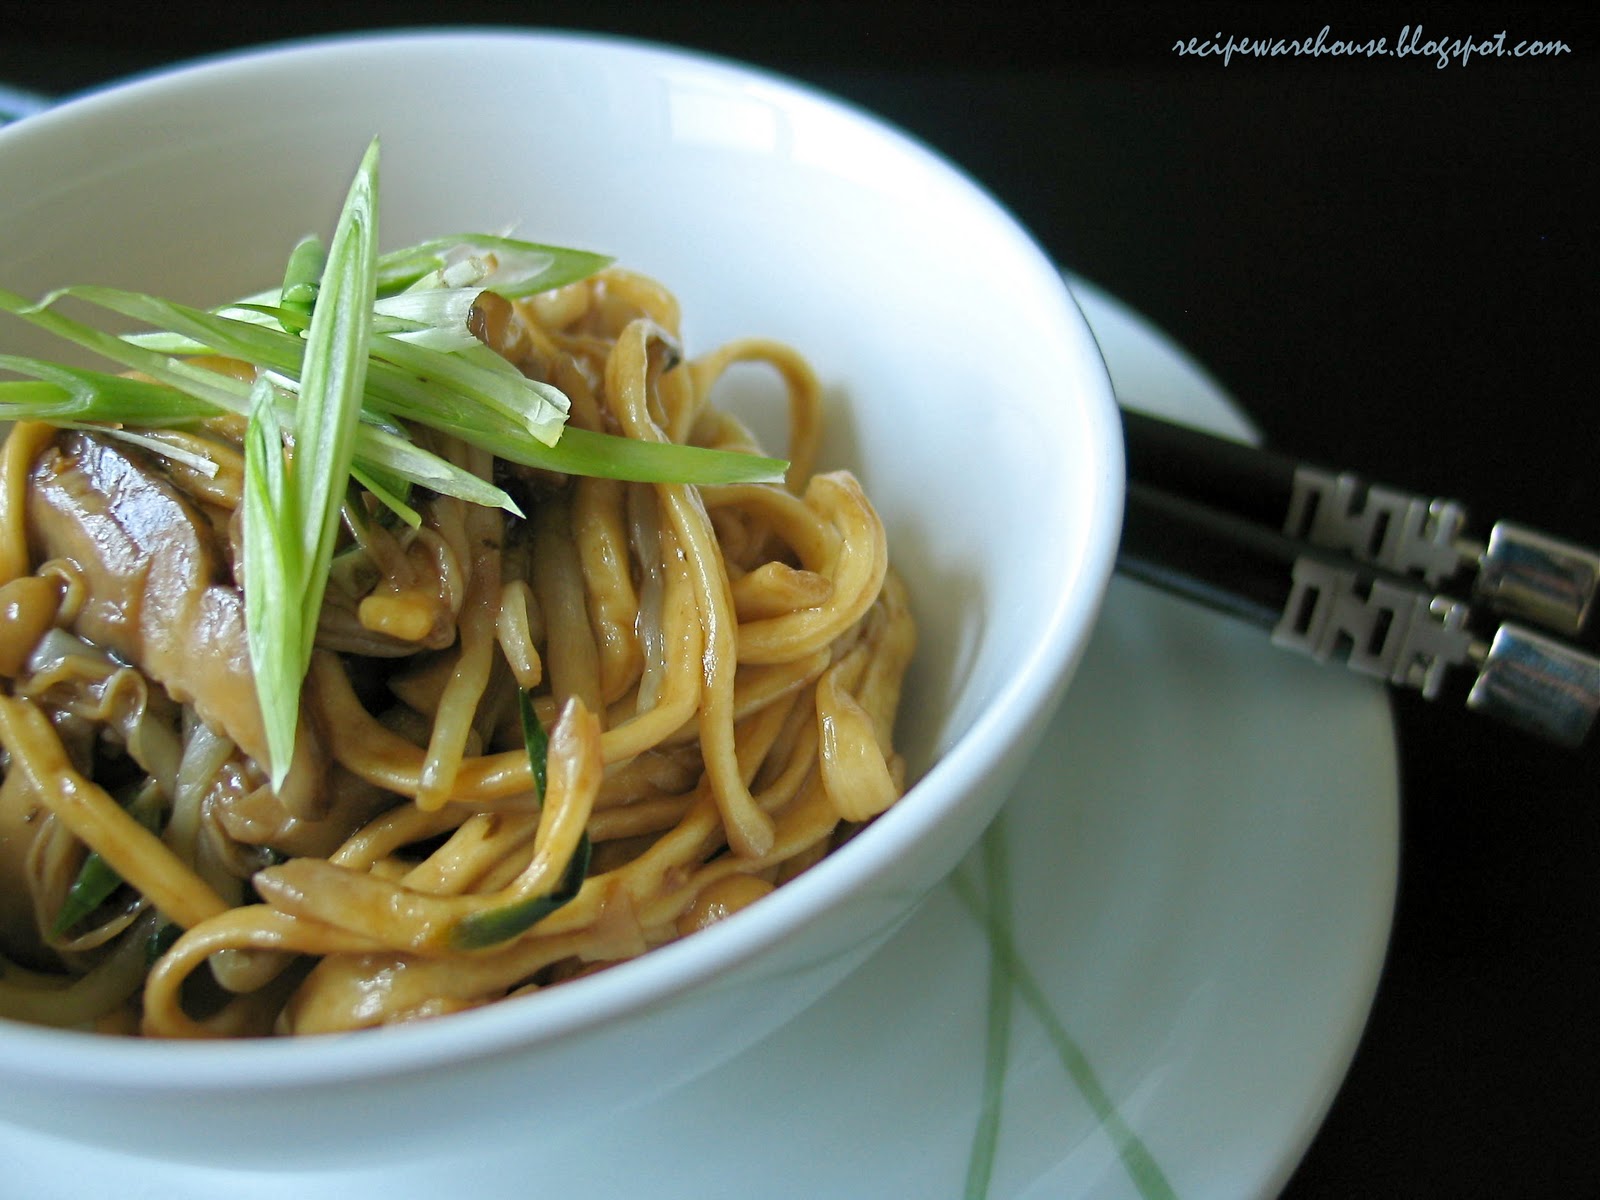
I wish I had chosen to make this noodle dish with udon instead of soba. Somehow the buckwheat taste doesn't go well with miso. I should have guessed as much because I don't recall ever seeing soba noodles served in miso soup. Anyway I am putting this down for records so that I will remember to try it again with udon that is!
To round off the meal, I made yakitori to go with the noodles. Yakitori is a once in a while treat for the family because I find it quite time-consuming having to skew the chicken one piece at a time... and it didn't help that Elaina was in a cranky mood today.
Ingredients:
- 7 ounces dried udon or soba (cooked according to instructions)
- 2 garlic cloves (minced)
- 6 ounces shimeji mushrooms
- 2 tablespoons light soy sauce
- 2 teaspoons miso paste
- 2 tablespoons finely minced parsley
Preparation:
- Heat oil in a skillet over a low heat and add the garlic cloves. Saute until fragrant.
- Turn up the heat and add the shimeji mushrooms and saute until the mushrooms are soft.
- Lower the heat and add a ladleful of water, soy sauce and the miso paste. Stir until the miso is dissolved well.
- Adjust seasoning with salt and pepper and leave the sauce to simmer.
- Add noodles to the sauce. Stir well to coat every noodle
- Serve with chopped parsley.
Number of Servings: 2

Saturday, May 2, 2009 at 11:39 PM
Posted by Vivian in
Egg,
Italian

Not too happy with 2 things today... one, the cheddar cheese which I bought last week had gone moldy even though the expiry date stated on the packet says "14 June 2009". As a result I had to live without the topping for this dish.
Second thing that upset me was the photo selection which took me less than 10 minutes - simply because none of the photos turned out well enough to do justice to this savoury dish. They all look like a blob of mess!! For now, I will have to make do with this photo until the next time I cook this again.
Ingredients:
- 1 onion (finely chopped)
- 125 gm ham (sliced)
- 6 eggs
- 3 tablespoon of milk
- 2 cups of cooked fusilli (yielded from 150 gm of uncooked dried fusilli)
- 1/4 cup grated Parmesan cheese
- 2 tablespoons chopped fresh Italian parsley
- 1 tablespoon chopped fresh basil
- 1/2 cup grated Cheddar cheese
Preparation:
- Heat 1 tablespoon of oil in a pan.
- Add onion and stir over low heat until tender.
- Add ham and stir for 1 minute. Remove from heat and transfer to a plate.
- Whisk egg together with milk, salt and pepper. Stir in pasta, Parmesan, herbs and onion mixture.
- Preheat grill to hot.
- Heat 1 tablespoon of oil in the same pan.
- Pour mixture into pan. Sprinkle with Cheddar and cook over medium heat until the omelette begins to set around the edges.
- Then place pan under grill until lightly browned on top.
- Cut into wedges and serve hot.
(If pan is not oven-proof, transfer the mixture from the pan to an oven-proof dish then sprinkle with Cheddar before putting under grill.)
Number of Servings: 3 to 4
Sunday, April 26, 2009 at 11:06 PM
Posted by Vivian in
Chinese,
Rice

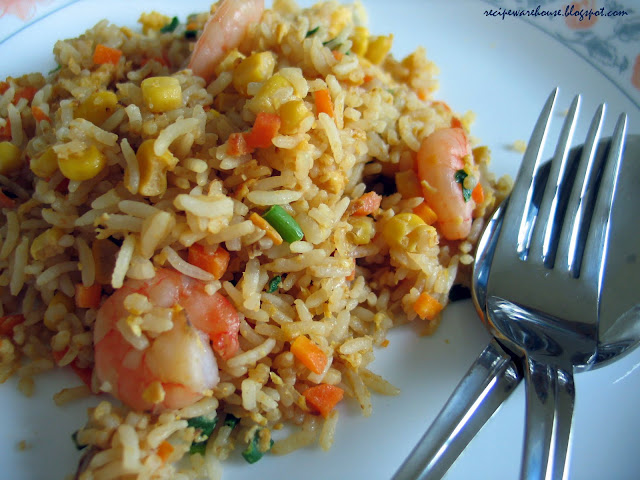
Stumbled upon this great site 2 weeks ago - http://steamykitchen.com/blog/. Great photos, wide range of recipes and I truly enjoy the writing style of the site owner. I haven't really had the time to fully explore the site for past recipes but did managed to pick up this one and decided to attempt it today.
Perhaps this is not the first time I am making fried rice (with my mum's recipe though) so I was daring enough not to follow the recipe as closely as I usually would for any maiden attempt, especially where the seasoning is concerned. And instead of frozen peas and carrots, I added in fresh carrots and canned corn kernels.
Ingredients:
- 400 gm small uncooked shrimp (shelled and de-veined)
- 1/4 teaspoon salt
- Freshly ground black pepper
- 1/2 teaspoon cornstarch
- 4 eggs (beaten and seasoned with a bit of light soy sauce)
- 2 stalks scallion or green onion (minced)
- 2 cups price (cooked the day before and refrigerated overnight)
- 1 carrot (diced)
- 1 small can of corn kernel
- Light soy sauce
- Sesame oil
- 4 garlic cloves (minced)
Preparation:
- Marinate shrimp with the salt, pepper and cornstarch for at least 10 minutes at room temperature.
- Heat a wok or large sauté pan on high heat. Add 1 tablespoon of cooking oil and swirl to coat pan.
- Add the shrimp and spread out around the pan so that they are not overlapping. Let the shrimp fry, untouched for 30 seconds. Flip over and let the other side fry for 30 seconds, or until about 80% cooked through. Remove the shrimp from the pan onto a plate, leaving as much oil in the pan as possible.
- Turn the heat to medium and let the pan heat up again. Pour in the eggs, stirring in a quick motion to break up and scramble the eggs. When the eggs are almost cooked through (they should still be slightly runny in the middle), dish out of the frying pan onto the same plate as the cooked shrimp.
- Use a paper towel to wipe the same wok or sauté pan clean and return to high heat with 1 tablespoon of cooking oil, swirling to coat. When the oil is very hot, add in garlic and green onions and stir fry until fragrant, about 15 seconds.
- Add in carrot and corn and continue to stir-fry.
- Add in the rice and stir well to mix . Spread the rice all around the wok surface area and let the rice heat up, untouched until you hear the bottoms of the grains sizzle, about 1-2 minutes. Use the spatula to toss the rice, again spreading the rice out over the surface of wok or pan
- Drizzle the soy sauce all around the rice and toss.
- Return the cooked eggs and shrimp back to the wok and add in sesame oil, tossing to mix the rice evenly with all of the ingredients. Let everything heat back up again.
- Taste and add an additional soy sauce if needed.
Number of Servings: 4
Sunday, April 19, 2009 at 10:47 PM
Posted by Vivian in
Chicken
I got this recipe through Cathy which belongs to her mum... and like all "mum's recipe" this is a definite keeper. The chicken turned out really flavourful.
Almost ended up with a botched job today because I attempted to grill the chicken instead of baking it (which is what I usually do). Somehow I just don't have luck with the oven when it comes to grilling. The oven's heat distribution is pretty poor and I had parts of it browning too quickly. Had to switch to convection setting halfway through. That was a very close call.
Ingredients:
- 1 kg chicken
- 2 tablespoon vegetable oil
- 2 tablespoon light soy sauce
- 1/4 teaspoon five spice powder
- 2 tablespoon tomato sauce
- 1/4 teaspoon salt
- 1 small crushed clove of garlic
Preparation:
- Mix all ingredients together to coat chicken and leave overnight in fridge.
- Either barbecue, grill or bake the chicken.
Number of Servings: 6
at 4:06 PM
Posted by Vivian in
Chicken,
Chinese,
Rice

Updated on 19 April 2009:
The claypot rice that we just had for lunch this Saturday is definitely the most successful thus far. Have tweaked the cooking time slightly and seems to work better, at least I don't need to add in stock to prevent the rice from over-burning. I have also added the mushroom during marination and they tasted much better.
Updated the photo as well because the previous photo looked really crappy!
The most difficult part of this dish needless to say is controlling of the fire and the amount of stock that goes into it. Until today after many attempts, I am unable to say with confidence that I got the hang of it. I usually will have a pot of stock by the side so that I can add more in before the rice gets badly burnt. Need to play cheat a little here.
I know that the other way to cook this dish is to use the rice cooker. When the rice is half done, the chicken mixture and mushroom goes on top. Will probably try this out one day just to taste the difference.
One pot requires around 45 minutes of cooking time. It is a long wait but definitely worth it.
Ingredients:
- 3 Chinese sausages
- 4 chicken thighs
- 2 tablespoon oyster sauce
- Sesame oil
- 1 tablespoon dark soy sauce
- 1 tablespoon light soy sauce
- 2 fat garlic cloves (crushed)
- 5 spring onions(chopped)
- 1 teaspoon cornflour
- ½ glass rice wine
- 1 inch ginger (julienned)
- 1 tablespoon brown sugar
- 5 dried shitake mushrooms (pre-soaked)
- 2 cups rice
- 3 cups stock
Preparation:
- Mix the chicken and sausages in a bowl with all the ingredients except the rice, and stock. Leave to marinate for at least half an hour.
- Put the rice and chicken stock in the cold claypot and place it over a medium heat for about 15 minutes with the lid on.
- The rice should be nearly cooked, with little holes on the flat surface. Reduce heat to low immediately.
- Spread the chicken mixture all over the top of the rice, and put the lid back on.
- Continue to steam over a low heat for another 20 to 25 minutes, until the chicken is white and cooked through.
Number of Servings: 4
Monday, April 13, 2009 at 11:06 PM
Posted by Vivian in
Japanese,
Rice
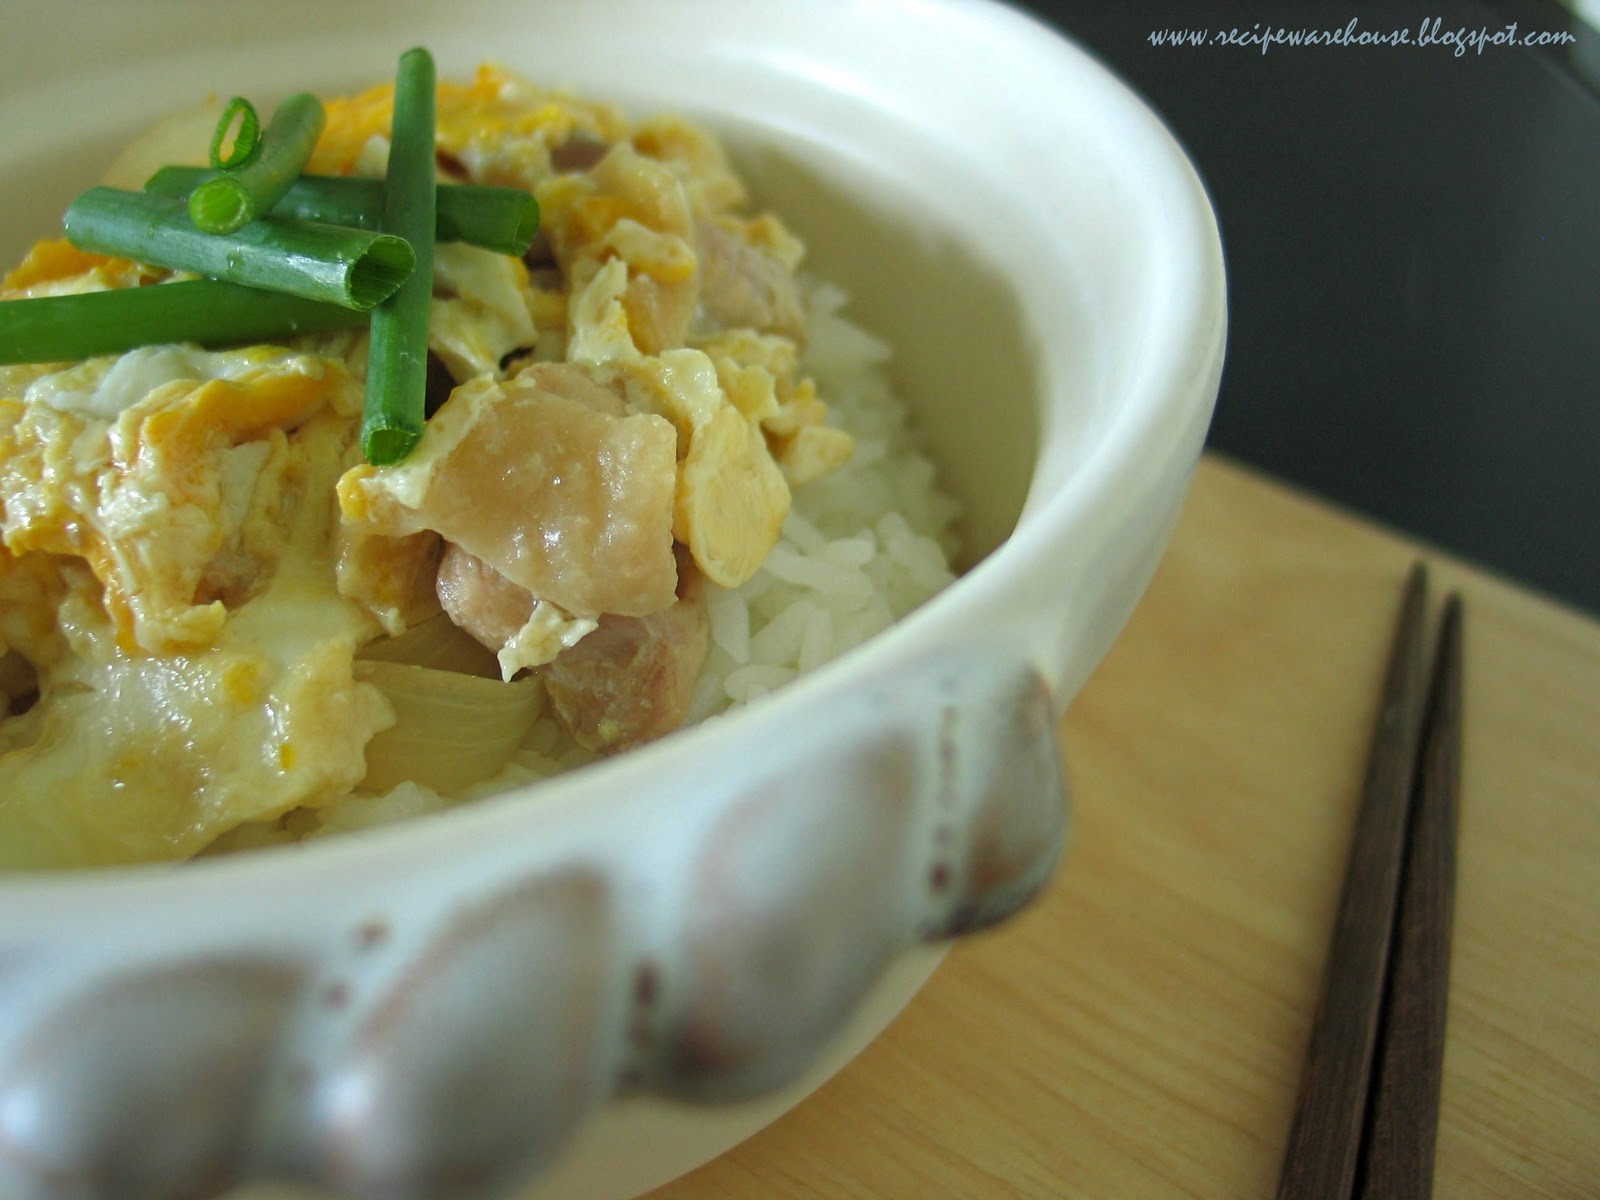
I had this recipe sitting in my "list of dishes to try" for a while and almost forgot about it. Maki of Just Hungry wrote an interesting article on Omu Rice and in her words "Omu rice, or rice omelette, is an example of yohshoku, Japanese food that originated in the west but was changed around to suit the Japanese palette".
I recall that the first and last time I had Omu Rice was a long long time ago at this Japanese restaurant located in Raffles City, which had closed down few years back. Haven't seen this appearing in the menu of other Japanese restaurant. I wonder why.
The most tedious part of making this dish is the need to make omelette after omelette just to meet the required quantity in order to feed the whole family. Practice does make perfect though. By the time I got to the 5th omelette, I was able to get it at the right consistency and in a bright yellow without a hint of browning.
Ingredients:
- 2 cups of cooked white rice
- 1 onion (finely chopped)
- 2 large cloves of garlic (finely chopped)
- 3 chicken thigh (de-boned and cut into small pieces)
- 1 can of button mushroom (sliced)
- 4 tablespoons of tomato ketchup
- 8 eggs (beaten and seasoned with salt)
- 100 ml of cooking wine
- Salt and pepper
Preparation:
- Season chicken with some salt (or light soy sauce) and pepper.
- Heat butter or cooking oil in frying pan.
- Saute garlic until fragrant. Add in onion and fry until translucent.
- Add in chicken and stir-fry until almost done.
- Add button mushroom to pan and continue to allow the chicken and mushroom to thoroughly cook.
- Pour wine into mixture and let the alcohol completely evaporate.
- Add in tomato ketchup and rice, and stir to mix well.
- Remove from heat and divide rice mixture into 4 portions.
- Coat skillet with oil.
- Make an omelette with 2 beaten eggs over medium to low heat. The omelette is only cooked on the underside, and the top should be slightly runny in the middle.
- Once done, turn off the heat and top 1 portion of the rice mixture on one side of the omelette.
- Using the help of a frying slice, fold the longer side over the rice.
- Lift and tilt the skillet and carefully roll the Omu Rice onto serving plate.
- Top with some ketchup and serve with vegetables on the side.
- Repeat the steps for omelette 3 times.
Number of Servings: 4
Monday, April 6, 2009 at 11:23 PM
Posted by Vivian in
Local,
Noodles

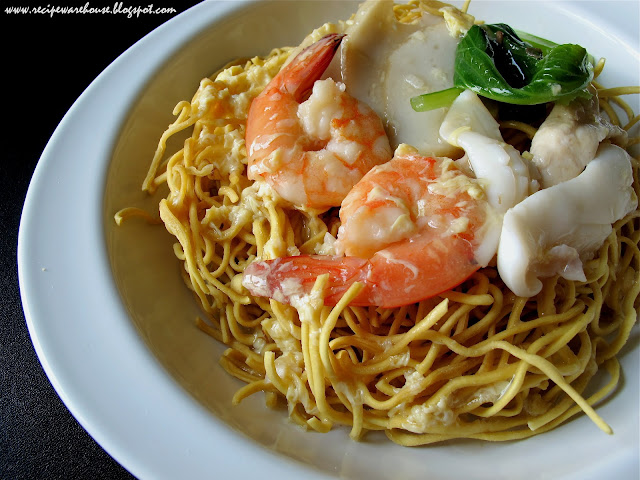
Hor Fun... one of my favourite local delight. Unfortunately, everyone in the family enjoyed this dish very much except for Matty. In other words, it will be a long long while before I whip this up again.
The quantity of certain ingredients is a little ambiguous. I tried comparing between the 2 recipes I found online and it was the case for both. So it was down to "guess-timation" on my part. I am therefore unable to jot down clearly how much sauce had gone into it.
If I am can, I would have added pork instead of chicken because some things just taste better with pork but which means my poor maid will not get to taste it. If I ever attempt this again, there will definitely be squid as one of the ingredient... just to get it as close as possible to the original dish.
Ingredients:
- 1kg of fresh noodles (kueh teow / hor fun)
- 3 chicken thigh (sliced)
- Fish cake (sliced)
- 10 medium-sized prawn
- 1 bunch of spinach
- 4 cloves of garlic (diced)
- 6 cups of chicken stock
- Oyster sauce
- Light soy sauce
- Dark soy sauce
- 2 eggs (lightly beaten)
- Cornstarch
Preparation:
- Marinate chicken with 1 teaspoon of corn flour and light soy sauce.
- Heat up 2 tablespoon of oil and stir-fry noodle with light soy sauce and dark soy sauce until it is warm and slightly browned. Remove and set aside.
- Add more oil to the frying pan and stir-fry garlic.
- Add chicken to pan and stir-fry for a minute.
- Add in chicken stock, 3 tablespoon of oyster sauce and 3 tablespoon of light soy sauce. Bring to boil.
- Add in spinach, prawns and fish cake. Allow ingredients to cook.
- Check seasoning.
- Lower heat and add in cornstarch (4 tablespoon of corn flour mixed with 100ml of water) and bring to boil.
- Turn off heat and stir in beaten egg. Gently stir to cook the egg.
- Dish gravy over fried noodles.
Number of Servings: 4
Tuesday, March 31, 2009 at 10:52 PM
Posted by Vivian in
Chicken

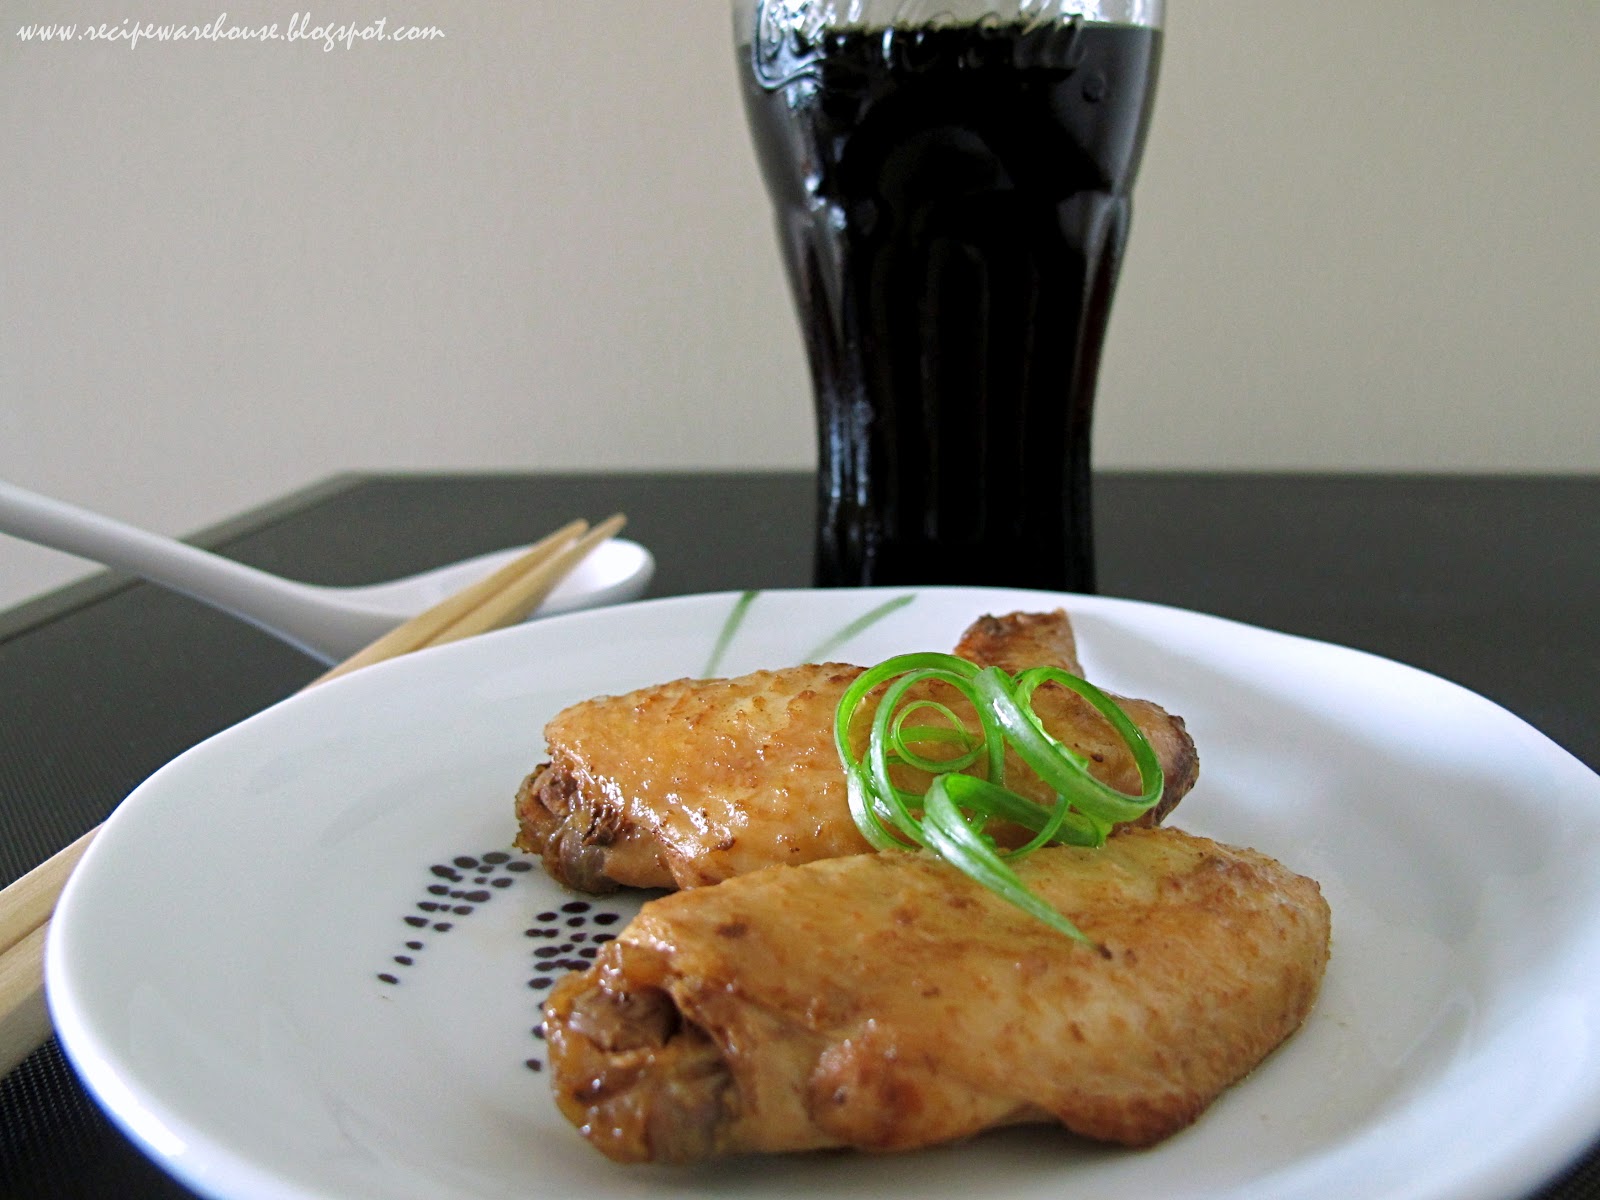
This is a common dish for many and but the recipe somehow differ from person to person. Before this, I was using the most basic marinade made up of a mix of light soy sauce, dark soy sauce and honey. Then came this recipe which belongs to my mum-in-law. The taste had more substance as compared to mine and since then I have tossed my old recipe out.
Ingredients:
- 6 chicken drumstick or thigh
- 1 tablespoon dark soy sauce
- 3 tablespoon teriyaki sauce
- 3 tablespoon oyster sauce
- 3 tablespoon honey
Preparation:
- Mix dark soy sauce, teriyaki sauce and oyster sauce together.
- Add chicken to sauce mixture and marinate overnight if possible.
- Preheat oven to 200 degree Celsius with conventional oven setting.
- Place chicken on tray and retain remaining sauce.
- Add honey to remaining sauce and mix well.
- Baste chicken with sauce before putting into oven.
- Bake chicken for 15 mins and remove from oven for one more round of basting.
- Bake chicken for another 10 to 15 mins until juices run clear.
Number of Servings: 4 to 6
Saturday, March 28, 2009 at 11:52 PM
Posted by Vivian in
Bread

Another simple breakfast idea thanks to wokkingmum.
Ingredients:
- White sandwich bread
- Butter
- Parmesan cheese (powdered type)
Preparation:
- Butter bread.
- Spread Parmesan cheese on top of buttered bread evenly.
- Toast bread in oven toaster or oven until golden brown.
Number of Servings: Dependent on number of slices of bread used and appetite of diner.
Tuesday, March 24, 2009 at 11:30 PM
Posted by Vivian in
Italian,
Pasta

An extensive "research" for a great and easy baked pasta recipe was done a while ago and the truth was that it didn't seem like there was a definite way to put this dish together. The key was probably to make sure that the ingredients blend well with each other. And hence I concocted this recipe by adapting it from various sources.
The photo showed that I had used the big shell pasta because the supermarket ran out of penne the other day. I personally felt that penne will be a better choice with a baked pasta dish.
Ingredients:
- 200 gm penne pasta (pre-cooked) 5 sausages
- 200 gm swiss brown mushroom (thickly sliced)
- 1 big yellow onion (roughly chopped)
- 1 big bottle of tomato based pasta sauce
- Mozzarella cheese
- Cheddar cheese
- Dried parsley
Preparation:
- Heat up cooking oil in frying pan.
- Add in sausages and lightly brown it.
- Set sausages aside to let it cool and slice diagonally.
- With the same frying pan, add in a little more cooking oil and stir-fry the onion until almost done.
- Add in mushroom and stir-fry until the juices start to run.
- Remove the mushroom and onion mixture and set aside.
- Mix the pasta, sausages, onion, mushrooms with 3/4 bottle of the tomato paste.
- Add in mozzarella cheese (amount to personal liking) and sprinkle with a generous amount of dried parsley and mix well.
- Put mixture into an oven-proof dish and top with with more tomato paste to cover.
- Add cheddar cheese on top.
- Bake in pre-heated oven at 200 degree Celsius until the cheese melts and top browns.
Number of Servings: 4
(The one thing I learned is that the oven settings can be played around with even during cooking to attain the desired results. Of course this is usually learned through trial and error for different types of dishes. For this dish I started with fan-forced conventional oven to quickly melt the cheese and then up the temperature to 220 degree Celsius and changed the setting to fan-forced grill which helps to brown the top very quickly and nicely.)
Monday, March 9, 2009 at 12:25 AM
Posted by Vivian in
Korean,
Snacks

I only found out this week that justbento.com (sister-site of justhungry.com) is not only about bento basics and skills. There are actually some simple to follow recipes available as well. And so I attempted one of the recipe that was posted earlier this week by Maki.
The pancake didn't turn out as crispy as I though it would be. From the Just Bento site, Maki's pancake definitely looked crispier. I can't quite figure out the reason why but I suspect it has got to do with the ratio of the batter to the filler. She mentioned 7 oz of flour but also indicated that it is equivalent to 2 US cup. 1 US cup is 240 ml, so that should make it 480 ml . But 7 oz is only almost close to 210 ml. The consistency of the batter looked right today though. A little confused with the flour measurement. Will need to experiment with it again. Probably increase the ratio of the batter to the filler or reduce the filler significantly.
I think the kids would have preferred this deep-fried to pan-fried. So that is also one variation to consider.
Ingredients:
(1) Filling -
- About 3 cups of finely julienned vegetables (green onions, garlic chives, bean sprouts, carrots etc)
- 1 cup of kimchi cabbage roughly chopped or add more vegetable instead (I added normal cabbage instead)
- Other ingredients that can be added - ham, julienned meat etc
(2) Batter -
- 200 gm / 7 oz (about 2 US cups) white all-purpose flour or cake flour
- 1 large egg beaten
- 250 ml water
- Pinch of salt
(3) Dipping Sauce -
- 2 tablespoon soya sauce
- 1 tablespoon rice vinegar or lime juice with a mix of 1 tablespoon sugar
- Few drops of chili oil to taste
- Chopped green onion
Preparation:
Sift flour and salt together. Combine the egg with water. Add the liquid to the flour gradually to form a thin batter. Set aside for at least 1/2 hour if possible.
Mix the batter and the other ingredients together (ratio of filler should be quite high).
Heat up frying pan or griddle and coat with oil. A little sesame oil can be added for a nutty flavour.
Spread the mixture out as thin as possible on the pan and cook over medium heat until crispy and golden brown, then turn over and cook on the other side.
Cut into wedges or square before serving.
Number of Servings: 4
Saturday, March 7, 2009 at 11:16 PM
Posted by Vivian in
Italian,
Pasta

This recipe is adapted from a book titled "Pasta. Best-Ever Pasta & Sauce Recipes".
Why do I say that it is adapted rather than lifted from the book? It is because I changed one of the major ingredient of this dish - lobster tail meat. I don't really think that I can find lobster in a supermarket and even if I can it will burn a big hole in a pocket. The book suggested that raw bug tail can be used as a replacement. That sounded very foreign and exotic to me. Again I doubt that I can find it in the supermarket. Hence, prawns were added instead.
Ingredients:
- 400 gm fettuccine (pre-cooked)
- 4 large garlic cloves (diced)
- 250 gm Swiss brown mushroom (sliced)
- 400 gm prawns (shell removed and deveined)
- 1/2 cup white wine
- 1/2 teaspoon saffron threads
- 700 ml thick cream
- 2 egg yolks (beaten)
Preparation:
- Heat olive oil or melt 60 gm of butter in a large deep frying pan.
- Add garlic and mushrooms, and cook over medium heat for 2-3 minutes or until mushrooms turn soft.
- Add in prawn and cook through.
- Remove mixture from pan.
- Add in wine and saffron threads to the pan, scrapping the bottom to collect any bits. Bring to boil and cook for 2 to 3 minutes, or until reduced.
- Add in cream, reduce the heat and simmer for 5 minutes.
- Add in some salt to taste.
- Whisk through the egg yolks until thickened.
- Return the prawns and mushrooms to the pan and stir well.
- Serve hot with sauce over fettuccine.
Number of Servings: 4 to 6
(Tip: To prevent the sauce from turning into an egg-drop soup, I read somewhere before that a little of the sauce should be added to the beaten egg first, stir to mix well and then repeat this step at least 2 to 3 times before adding the egg into the pan. By doing so, it slowly increases the temperature of the egg and prevent the egg from being cooked too fast. This ensures that the egg will mix thoroughly with the sauce.)


.JPG)


